- Modules
- Basic Effects with Harmony Essentials
- Activity 3: Masking a Light Source
Activity 3: Masking a Light Source
T-HFND-010-016
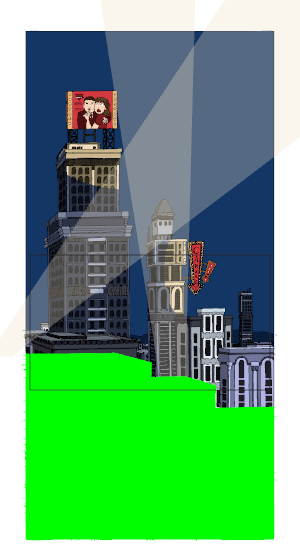
In this activity, you will mask the portion of the search lights that should be hidden behind buildings using a Cutter effect. You will complete the project by animating the camera panning upwards.

Material
- The final night_scene scene you completed in the previous topic or
- MO-HFND-010-Library/06-search-light-blur.tpl
- MO-HFND-0011_Library/07-mask.tpl
- MO-HFND-0011_Library/08-search-light-cutter.tpl
- MO-HFND-0011_Library/09-camera-move.tpl
How to add blurs and transparencies
- Open the final night_scene scene you completed in the previous topic. If you do not have it, do the following:
- Create a new Harmony project and name it: night_scene. Make sure to select the HDTV_1080p24 resolution.
- Select Scene > Scene Length and set the number of frames to 120 and press OK.
- In the Library view, from the provided assets, import the 06-search-light-blur.tpltemplate.
- In the Library view, from the provided assets, import the 07-mask.tpl template.
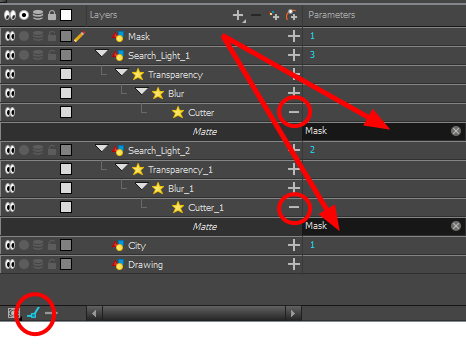
- In the Timeline view, right-click and select Insert > Effects > Cutter to add 2 Cutter nodes.
- Connect the nodes so they match the following example. The Mask layer is connected to both Matte input of the Cutter node. Note that the Cutters are connected to the Blur nodes.

- In the Camera view status bar, click the Render Mode
 button to preview your final effects. Remember that you cannot playback your animation in Render mode.
NOTE: If you have issues with any of the previous steps, simply import the 08-search-light-cutter.tpl template from the Library to the Camera view.
- In the Camera view status bar, click the OpenGL Mode
 button to animate the Camera.
- Add a camera to your scene by selecting Insert > Camera.
- In the Timeline view, select the Camera layer.

- From the Layers toolbar, click the Add Peg
 button.
 - In the Tools toolbar, enable the Animate
 mode.
mode.
- On the right side of the Timeline view, on the Camera Peg layer, select the frame at which you want the camera move to start.
- In the Timeline toolbar, click the Add Keyframe
 button.
 - In the Top, Side or Camera view, select the camera (the large V-shaped cone) and move it to the desired position. In the Camera view, the camera is represented by a thin frame. You need to click directly on one of the edges.
- On the Timeline view, click the cell on which the camera move will end.
- In the Timeline toolbar, click the Add Keyframe
 button.
 - Play back
 your animation.
- In the Timeline view, select the first camera move keyframe.
- In the Timeline toolbar, click the Set Ease For Multiple Parameters
 button.
- In the graph, adjust the Bezier handles to change the velocity for all the selected functions.
- Click Apply/Next to adjust the last keyframe.
- Once complete, click Close.
- Save your project.
-
Play back
 your animation.
- Save your project.
- Export your scene as a QuickTime move through File > Export > Movie.
NOTE: If you have issues with any of the previous steps, simply import the 09-camera-move.tpl template from the Library to the Camera view.
Time Estimated 30 mins
Difficulty Level Beginner
Topics List
- About Effects
- Adding Effects
- Connecting Effects
- Blur
- Transparency
- Cutter
- Using the Cutter Node
- Glow Node
- About Effects Preview
- Previewing Effects in Render Mode
- Playing Back Effects
- Exporting a QuickTime Movie
- Activity 1: Staging a Night Scene
- Activity 2: Adding Blurs and Transparencies
- Activity 3: Masking a Light Source