- Modules
- Basic Concepts with Harmony Advanced
- Line and Colour Layers
Line and Colour Layers
T-PRIN-005-007
Before the advent of computers, animation was done manually. There was no process of scanning and painting digitally. Once the animation was completed and cleaned on paper, the drawings were traced with a brush or a quill onto cels. The cel transparency permitted many layers to be superimposed, composing the scene elements together.

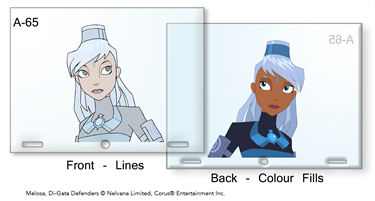
The first step in the cel process is to ink the lines on the front side of the cel, either in black or with different colours. In the late 1950s, this step was changed to photocopying the drawings on the cels, called the Xerox process. Once the lines are inked, it is time to fill in the colours, usually painted with a brush. Painting on the same level as the lines makes it all too easy to accidentally go over the line or not apply the colour densely enough, so light is passed through the drawing. To remedy this, colours are painted on a second level onto the back of the cel. This protects the lines from any colour stains and the colour filling can go under the lines covering the entire zone.
Working digitally produces a similar process. Once you have scanned drawings into the system, you can colour the lines without ruining the colour filling, or you can paint complete zones without staining the lines. If there is some transparency (alpha) or texture in the line, the colour filling is allowed to go under the lines to create the correct look.
Next Topic
Pegs
Time Estimated 10 mins
Difficulty Level Beginner