- Modules
- Head Turn Animation
- Activity 4: Setting Eases on a Head Turn
Activity 4: Setting Eases on a Head Turn
T-ANIMCO2-001-005
In this topic, you will learn how to set eases on your keyframe to add a natural feeling to your motion and create accelerations and decelerations.
Material
To complete this topic, you will need the following from the sample material you downloaded:
- MO-ANIMCO2-001/05_Coordinates.tpl
- MO-ANIMCO2-001/06_Coordinates.tpl
How to set the ease on multiple parameters
- In the Timeline view, select a keyframe on one or more layers.

NOTE: Only the first selected keyframe will be considered when using the Set Ease For Multiple Parameter function. If many keyframes are selected on the same layer, the ease values will be applied only on the first keyframe and the rest will be ignored.
- Do one of the following:
- In the Timeline view, right-click and select Set Ease For Multiple Parameters.
- In the Timeline toolbar, click the Set Ease For Multiple Parameters
button.
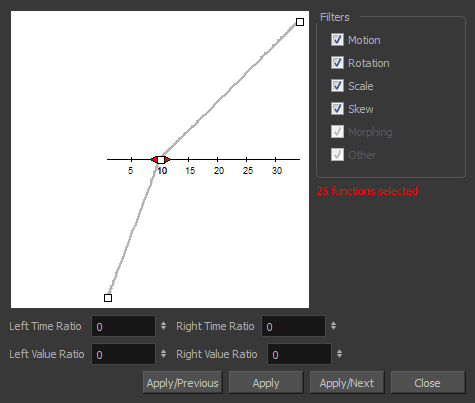
The Set Ease For Multiple Parameters dialog box opens.

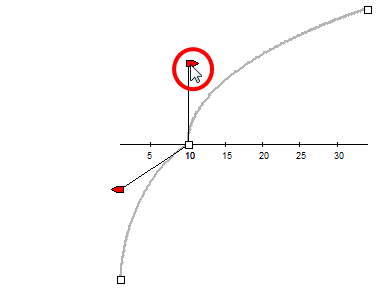
- In the graph, adjust the Bezier handles to change the velocity for all the selected functions.

- In the Filters section, you can apply the easing parameters to a specific type of function only, such as Rotation or Scale. Deselect the function types you do not want to affect.
- Motion: Applies the easing parameters to the selected Position X, Position Y, Position Z and 3D Path functions.
- Rotation: Applies the easing parameters to the selected Angle functions.
- Scale: Applies the easing parameters to the selected Scale functions.
- Skew: Applies the easing parameters to the selected Skew functions.
- Morphing: Applies the easing parameters to the selected Morphing Velocity functions. Note that it applies to the Morphing velocity function found in the Layer Properties window, not the basic morphing ease in the Tool Properties view.
- Other: Applies the easing parameters to all the other the selected functions, such as all functions created to animate effect parameters.
- You can also adjust the easing by typing values in the Time and Value Ratio fields. The values are calculated in percentage.
- In the Left Time Ratio and Right Time Ratio fields, type the percentage value corresponding to the length of time you want the easing to last. Stay between 0% and 100%. If you go beyond 100%, your motion will overshoot.
- In the Left Value Ratio and Right Value Ratio fields, type the percentage value of how strong you want the easing out to be. Stay between 0% and 100%. If you go beyond 100%, your motion will overshoot.
- If your Time Ratio and Value Ratio values are equal, you will have a linear motion.
- Once done, click one of the following:
- Apply/Previous: Applies the easing parameters to the selected keyframes and then selects the previous keyframe in the timeline.
- Apply: Applies the easing parameters to the selected keyframes.
- Apply/Next: Applies the easing parameters to the selected keyframes and then selects the next keyframe in the timeline.
- Close: Close the dialog box. If you did not apply the modifications, they will be cancelled.
- Stacey Eberschlag
- Senior Solutions Specialist
- toonboom.com
Author
Time Estimated 15 mins
Difficulty Level Intermediate
Topics List
- Coordinate Toolbar
- Activity 1: Show and Hide Peg Groups by Scaling
- Activity 2: Animating a Basic Head Turn
- Activity 3: Setting Scale Keyframes
- Activity 4: Setting Eases on a Head Turn
- Activity 5: Setting Keyframes on 2s