- Modules
- Introduction to Animation with Harmony Advanced
- Activity 1: Rough Animation
Activity 1: Rough Animation
T-HFND-006-012
In this activity, you will be creating a rough animation of a bouncing ball. This classic exercise will help you understand many concepts including, timing, key and breakdown poses.
At each stage of creating your animation, there is a corresponding template for you to use as a reference for creating your own bouncing ball animation.
The colour palette that comes with the material is called Bouncing_Ball_Complete and it contains preset colour swatches for the different tasks you will perform.
Before starting, make sure you have downloaded the material that goes with this activity and that you know how to open templates in Harmony.
Material
- MO-HFND-006/bouncing-ball-adv-prm
How to create rough animation
- Start Harmony and create a new empty scene.
- From the Library view, open the Bouncing Ball folder that contains the templates for this tutorial: MO-HFND-006/bouncing-ball-adv-prm.
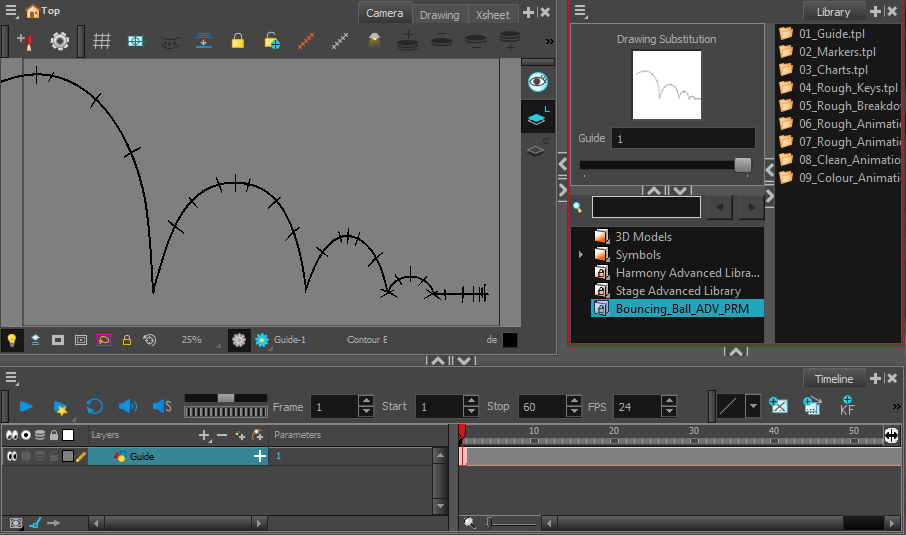
- Drag the 01-guide.tpl to the Camera view.
You should see the trajectory that the bouncing ball will follow. This will be very useful for a smooth movement. Each line represents a drawing.
- Import the 02-markers.tpl template.
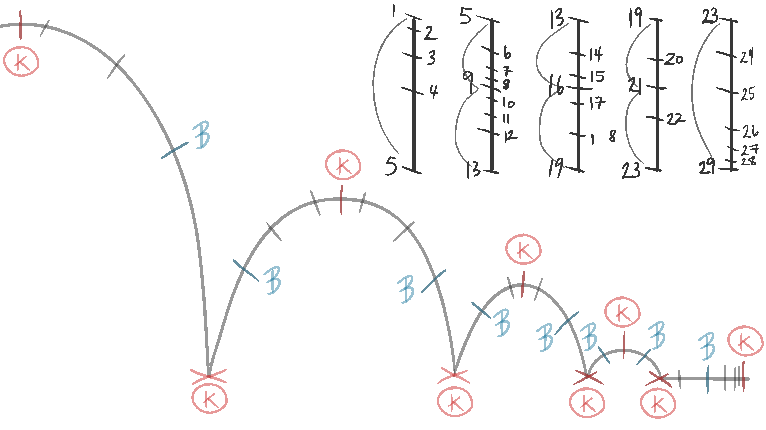
A new layer is created on which you should see the key frames (K) and breakdowns (B) proposed for this exercise.

- Import the 03_Charts.tpl file to your project to see the breakdown of the movement as it is positioned on the curve. Each chart represents part of the movement. Chart 1 to 5 is the ball coming down, chart 3 to 13, 13 to 19 and 19 to 23 represent the three bounces of our ball, and frames 23 to 29, the settling down and stopping of our ball. These are applied to your curve in the same way. More drawings will mean a slower motion, while fewer will mean faster movement
Study the guide and decide how the path of your bouncing ball will look.
- Start creating your guide by adding a new drawing layer to the Timeline view. Click the Add Drawing Layer
 button or press Ctrl + R (Windows/Linux) or ⌘ + R (macOS).
The Add Drawing Layer window opens.
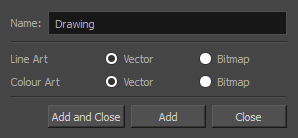
- In the Name field, give the layer a name.
- Set the Line Art and Colour Art options to Vector and click Add and Close.
A new drawing layer is added to the Timeline view.

A new column is added in the Xsheet view.
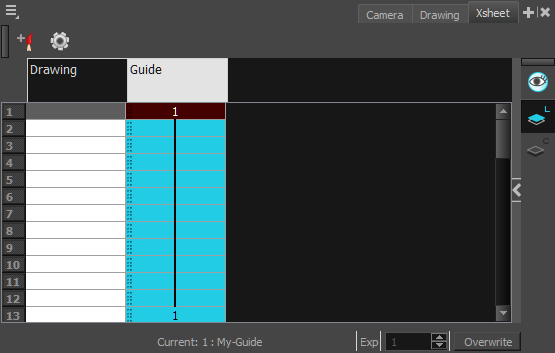
- In the Timeline view, select the layer you created and then select the first cell. You can turn layers on or off by using the Enable/Disable All
 button or press D.


- Use the Pencil
 or Polyline
  tool to create your own trajectory on the My_Guide layer.
- In the Colour view, click the black Guide colour swatch. The colour palette you are using, called Bouncing_Ball_Complete, comes with preset colour swatches for the different tasks you will perform while designing your animation. The colour for the guide you will draw is a basic black colour.
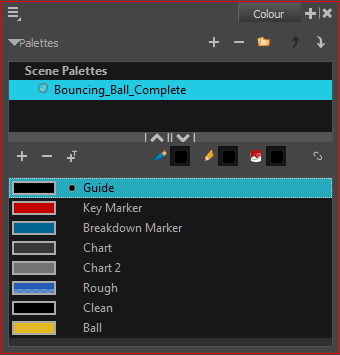
- On the same layer, add the keyframes, breakdowns and inbetweens markers.
- To mark the key drawings, use the red Key Marker colour swatch. To mark the breakdown drawings, switch your brush colour to the red Breakdown Marker colour swatch and add the breakdowns.
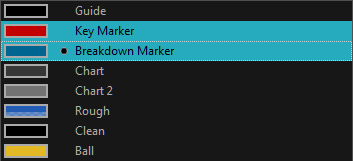
- When your guide is complete, create a new layer and name it: My_rough.
- With the imported templates visible, import the 04-rough-keys.tpl template into your scene. The layer contains multiple drawings of all the key positions that were marked on our guide.
- Select the My_rough layer. Use the Brush
 tool and the Rough colour swatch to create your first key pose on frame 1, as marked on your guide markers. When no drawings exist at the selected frame and drawing layer, a new drawing is created.
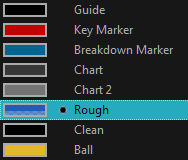
- Create all other keyframe drawings on their appropriate frames. You should only have one ball per drawing, as each ball will be drawn on different frames. For a more dynamic animation, note how the ball squashes down when it bounces.
- Once all your keyframes are created, select all of them on the Timeline view.
- If it does not already show on your workspace, display the Mark Drawing toolbar. Select Windows > Toolbars > Mark Drawing.

- Click the Mark as Key Drawing
 button to identify the selected key frames. The drawings are marked on the Timeline and Xsheet views. To unmark them, click the Mark as In-between Drawing
  button.
 - You can import the 04-rough-keys.tpl file to compare results.
- Select each of your breakdown poses and click the Mark as Breakdown Drawing
 button.
Each drawing is marked in the Timeline and Xsheet views.
- Continuing on the My_rough layer, create your breakdown poses on their appropriate frames as per your guide. You can import the 05-rough-breakdowns.tpl file to compare results.
- Continuing on the My_rough layer, create the in-betweens for the remaining poses, as per your guide. Once they are drawn, you should have no more empty frames before your very last keyframe.
- In the Playback toolbar, click the Play
 button to view your animation.
 - You can import the 06-rough-animation.tpl file to compare the results.
- Currently, one drawing equals one frame. A common practice to extend the length of your animation is to set your drawings on "2s"; this means each drawing is exposed on two frames instead of one. This will make the animation last twice as long. To do this, select all the frames of the My_rough layer from the Timeline view, right-click and select Exposure > Set Exposure to 2.
- In the Playback toolbar, click the Play
 button to view your animation.
 - You can import the 07-rough-animation-2s.tpl file to compare results.
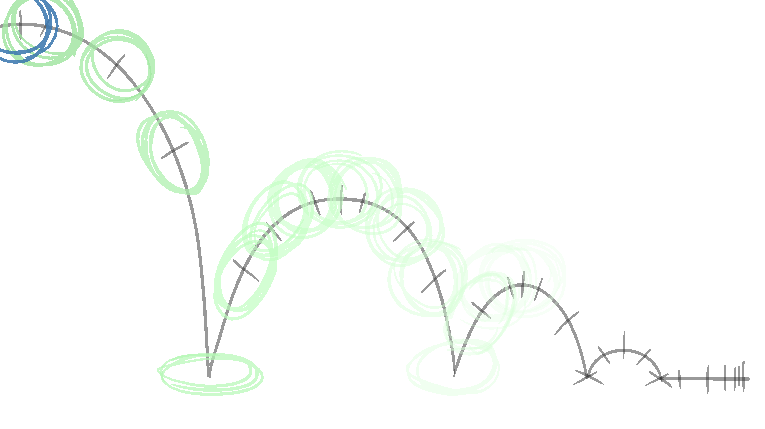
- Once you are happy with the look of the rough animation, you are ready to start cleaning on a new layer. Create a new layer named My_clean.
- To keep the ball from changing size, copy the drawing from the Camera view using the Select
 tool, then go to the next frame on which the drawing changes, paste the ball and reposition it.
 - Do the same for all other drawing changes, following the My_rough layer. Use the Select
 tool to change the shape of the ball and squash it to achieve the desired look.
 - Once you are done, you should have one drawing for every two frames.
- To complete the clean, extend the exposure of the new drawings. Select all the frames on the My_clean layer, right-click and select Exposure > Extend Exposure or press F5.
- In the Playback toolbar, click the Play
 button to view your animation.
 - You can import the 08-clean-animation.tpl file to compare results.
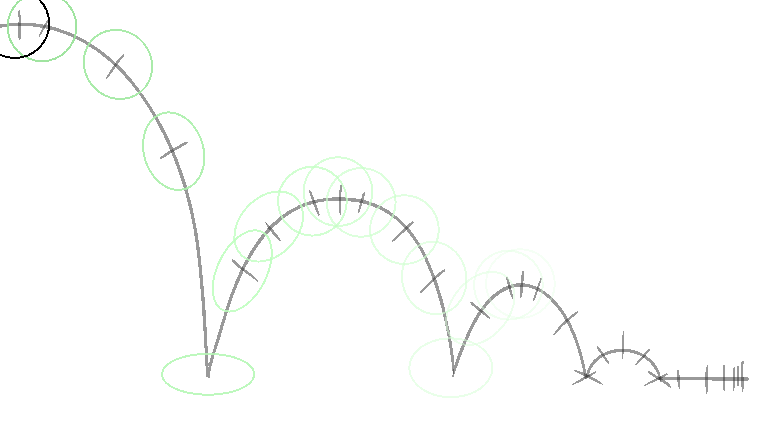
- Now that we have our clean animation, disable the My_rough layer and finish up your animation by painting the layers.
- From the Tools toolbar, select the Paint Unpainted
 tool that is under the Paint
 tool.
tool. - In the Colour view, select the yellow Ball colour swatch.

- Instead of painting every single frame one at a time, click the Apply to Multiple Drawings
 button in the Tool Properties view. Select the entire area containing the objects you need to paint. One way to easily achieve this is to use the Onion Skin
  (Alt + O). In the Timeline view, drag the blue onion skin markers to include all the frames so you can see them in the Camera view.

- From the Tools toolbar, select the Repaint
 tool and with the Apply to Multiple Drawing option selected, make a selection around all the drawings in the Camera view.
 - All drawings are painted. You can turn off the Onion Skin
 .
. - In the Playback toolbar, click the Play
 button to view your animation.
 - Save
 your project.
Time Estimated 40 mins
Difficulty Level Beginner
Topics List
- About Paperless Animation
- Timeline View
- Xsheet View
- About Marking Drawings
- Marking Drawings
- Extending the Exposure of Previous Drawings
- Using the Onion Skin
- Typing Exposure
- Creating Cycles
- Setting the Exposure
- Cleaning Animation
- Using the Light Table
- Activity 1: Rough Animation
- About Duplicate Layers
- Duplicating Layers
- About Colour Palettes
- About Colour Swatches
- Adding a Colour Swatch
- Adding a Gradient Colour Swatch
- Adding a Texture Colour Swatch
- Painting Multiple Drawings
- Activity 2: Changing the Colour of the Animation
- Activity 3: Adding a Colour Card and Exporting