- Modules
- Jump Animation
- Activity 2: Animating a Character Jumping
Activity 2: Animating a Character Jumping
Warning: DOMDocument::loadHTML(): Unexpected end tag : img in Entity, line: 5 in /var/www/html/app/models/TopicTranslation.php on line 28
Warning: DOMDocument::loadHTML(): Unexpected end tag : img in Entity, line: 23 in /var/www/html/app/models/TopicTranslation.php on line 28
Warning: DOMDocument::loadHTML(): Unexpected end tag : img in Entity, line: 30 in /var/www/html/app/models/TopicTranslation.php on line 28
Warning: DOMDocument::loadHTML(): Unexpected end tag : img in Entity, line: 33 in /var/www/html/app/models/TopicTranslation.php on line 28
Warning: DOMDocument::loadHTML(): Unexpected end tag : img in Entity, line: 41 in /var/www/html/app/models/TopicTranslation.php on line 28
Warning: DOMDocument::loadHTML(): Unexpected end tag : img in Entity, line: 50 in /var/www/html/app/models/TopicTranslation.php on line 28
Warning: DOMDocument::loadHTML(): Unexpected end tag : img in Entity, line: 62 in /var/www/html/app/models/TopicTranslation.php on line 28
Warning: DOMDocument::loadHTML(): Unexpected end tag : img in Entity, line: 65 in /var/www/html/app/models/TopicTranslation.php on line 28
Warning: DOMDocument::loadHTML(): Unexpected end tag : img in Entity, line: 71 in /var/www/html/app/models/TopicTranslation.php on line 28
Warning: DOMDocument::loadHTML(): Unexpected end tag : img in Entity, line: 74 in /var/www/html/app/models/TopicTranslation.php on line 28
Warning: DOMDocument::loadHTML(): Unexpected end tag : img in Entity, line: 75 in /var/www/html/app/models/TopicTranslation.php on line 28
Warning: DOMDocument::loadHTML(): Unexpected end tag : img in Entity, line: 75 in /var/www/html/app/models/TopicTranslation.php on line 28
T-EXC-003-003
This activity will be challenging and will take more time than the ones in previous lessons. It takes even the fastest animator with lots of experience a fair amount of time to animate a jump. You will probably spend most of your time looking at your own work, showing it to others and getting feedback.

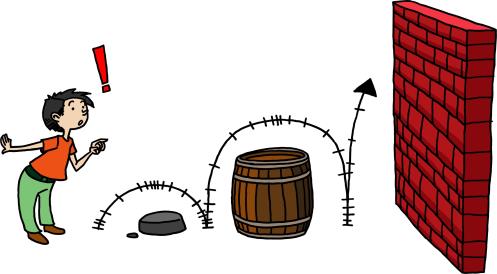
First, you need to plan what type of jump the character will perform. Is he running while jumping? Is he jumping over a rock? A fence? Or maybe he is jumping into something like a pool of water? If need be, you might also plan the layout. Do you need any accessories for this scene? Or a background?
Material
You can download the provided sample material for this module and use the following templates to use as a reference to compare with your final sketch. Don't forget to unzip (uncompress) the files before placing them in your library.
- MO-EXC-003/01-jump-guide.tpl
- MO-EXC-003/02-jump-on-the-spot.tpl
How to animate the jumping character
- Start Harmony.
- In the Welcome screen, name your project: Jump.
- In the Timeline view, click the Add Element
 button and select Drawing.
- For the jump, it is better to work with two drawing elements: one for the character and one to create a guide. Name one element Jump_on_the_Spot and the other element Jump_Guide.
Of course, if you need an accessory or a background, a drawing layer is needed for each one of these. Take the time to organize your scene.
- To help plan your animation, using the Brush
 tool, draw a guide to indicate where your character needs to go.

You now need to extend the exposure of the guide cell drawing you just completed.
- In the Timeline view, click the drawing cell, then right-click and select Extend Exposure.
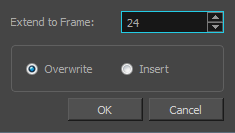
The Extend Exposure window is displayed.

- Extend the cell to frame 24.
NOTE: The number of frames needed depends on the length of your animation. If you need more frames, you can further extend the exposure by using the same method. If you have issues with any of the previous steps, import the 01-jump-guide.tpl template.
- Use the Brush
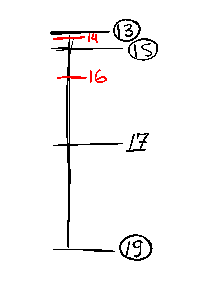
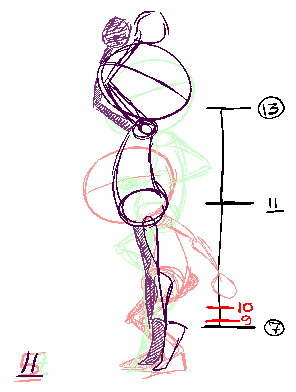
 Tool, and start sketching the key poses of the jump.
Remember to draw the basic figures of the character. Do not go into too much detail until you have sketched the entire animation. Go with the following key poses first:
- Anticipation
- Push
- Stretch
- Impact
- In the Tools toolbar, click the Onion Skin
 button and adjust the blue onion skin markers in the Timeline view to display the desired number of previous and next drawings.

- Animate the jump poses.

- Save
 your project. In the Save As window that opens, name your project Walk_cycle along with your initials.
 - Play back
 your animation and test/correct your work. You can also activate the Loop
  button to view your animation in loops while noting the corrections you have to do.
NOTE: If you have issues with any of the previous steps, import the 02-jump-on-the-spot.tpl template.
Time Estimated 30 mins
Difficulty Level Beginner
Topics List
- Deconstructing a Jump
- Activity 1: Jumping Around
- Activity 2: Animating a Character Jumping
- Activity 3: Animating a Four-legged Animal Jumping (Optional)