- Modules
- Project Creation with Harmony Essentials
- Creating Scenes
Creating Scenes
T-HFND-001-005
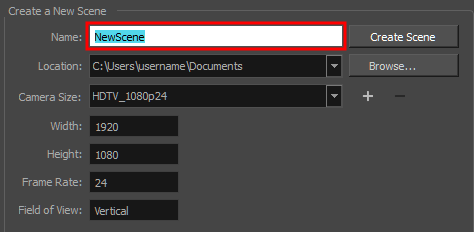
All scenes created via Harmony Stand Alone are independent and local to the computer. You can create or open a scene using the Welcome screen or the File menu.
How to create a scene from the Welcome screen
- In the Name field, type the scene’s name.

NOTE: The scene name should not exceed 23 characters and cannot contain special characters, such as *&^%!.
- To decide in which directory the scene will be created, click the Browse button next to the Location field.

- From the Camera Size menu, select a scene resolution.

- Click on Create Scene.
A new scene is created.
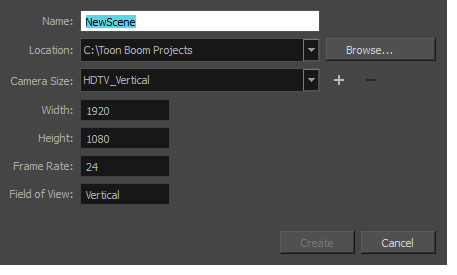
How to create a new scene from the File menu
- Do one of the following:
- From the top menu, select File > New.
- In the File toolbar, click the New
button.
- Press Ctrl + N (Windows/Linux) or ⌘ + N (macOS).
The New Scene dialog box opens.

- In the Project Name field, type the scene's name.

- Select a scene directory by clicking the Browse button.

NOTE: The scene name cannot exceed 23 characters and cannot contain special characters, such as *&^%!.
- In the Resolution window, select the scene’s resolution and click Create.
A new scene is created.
Next Topic
Creating Custom Resolutions
Time Estimated 10 mins
Difficulty Level Beginner