- Modules
- Camera Motion with Harmony Premium
- About Cameras
About Cameras
T-HFND-009-001
Harmony contains a camera that can move along the X, Y, and Z axes. Having the camera move on the Z-axis offers the possibility to create truck in and truck outs, as well as multiplane camera moves. The default camera position is centred and backed up to 12 fields.
It is important to understand the coordinate values in Harmony, which is based on the origins of animation. In traditional animation, a scene's size and camera motion are calculated in fields. A field has a 4:3 ratio and measures 0.5 inches (12.7 mm) in width. A specific grid has been created for this purpose known as a field chart. Harmony uses this unit of measurement as its coordinate system.
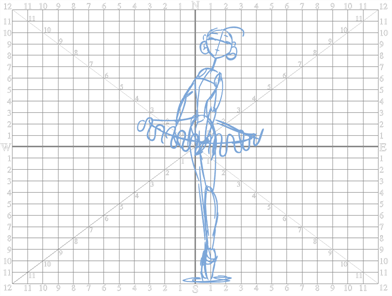
A field chart uses the cardinal directions. The X axis is the east-west (left-right) direction, the Y axis is the north-south (up-down) direction and the Z axis is the forward-backward direction.
The scene action occurs inside the camera frame, so it’s really important to set it up correctly. You can adjust the camera resolution and other parameters in the Scene Settings window.
By default, a scene does not have a camera layer. In order to be able to tweak the camera's angle and position, you must add one to your scene. Although it is possible to have several cameras in the same scene, you can only view your scene using one camera at a time. This can be useful if you are still working on your scene composition and have different camera framing to try out.
The Camera layer is static which means that if you need to animate it, you must put it under a parent peg.
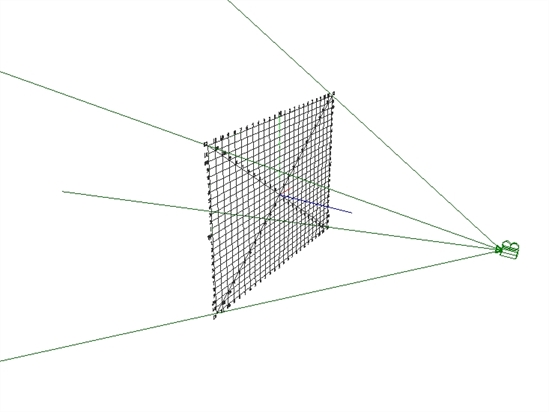
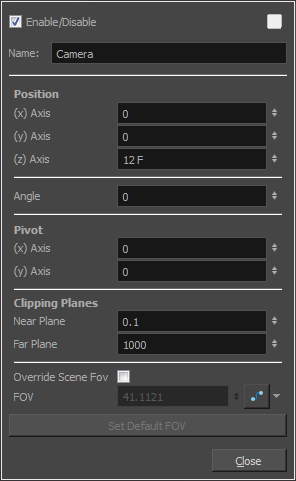
You can reposition your camera frame directly in the Camera view, using the advanced animation tools. Another way to set up your camera frame is to type the coordinates directly in the camera's properties. Doing this positions the camera precisely where you want it to be rather than gauging it visually.
Once you have a 3D set, the exciting part is to do a camera move in it. This section teaches you the main steps required to perform a 3D camera move. Once you know how to do this, you can enjoy the delights of working in 3D space and traveling through your creations!
Clipping Planes
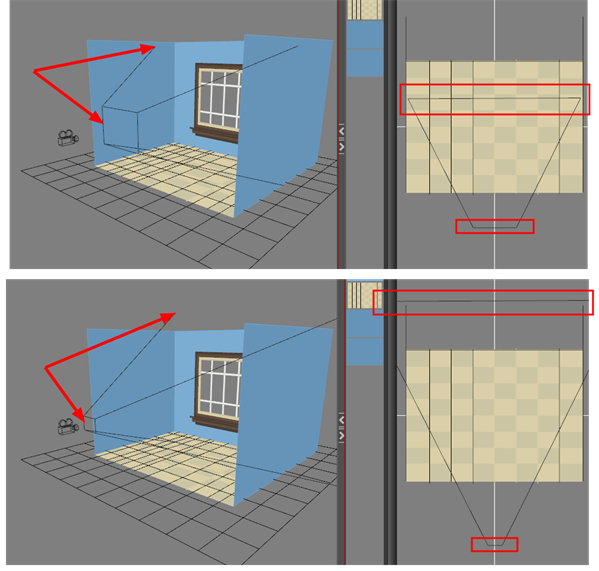
You can change the near and far clipping planes of the camera. The near plane is the point on the camera cone where the camera is located. The far clipping plane is the far end of the camera cone. Nothing outside that range is visible. This is useful when dealing with 3D elements and 3D sets. For example, the camera can be looking inside a 3D box or room and you might want the foreground wall to not obstruct the view of the interior. By default, the near clipping plane is set to 1 field and the far clipping plane is set to 1000 fields.
Camera Types
In Harmony, there are two types of cameras available:
- Perspective
- Orthographic
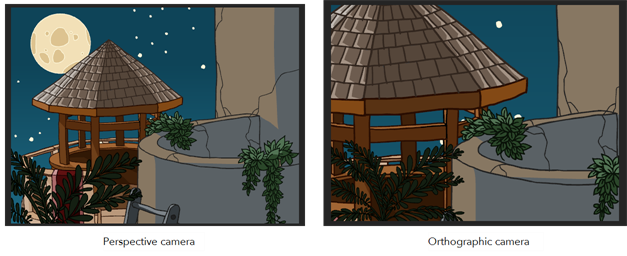
The orthographic camera is specific to the gaming pipeline. It changes the camera type from perspective to orthographic. It becomes a camera without vanishing points. This means there is no more perspective in the Camera view. Objects, when moved on the Z-axis, will not change in size or scale.
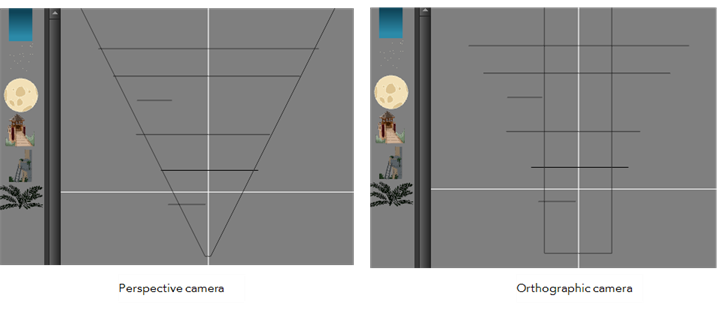
The orthographic camera can be set in the Scene Settings dialog box. In order to create scenes with the orthographic camera, by default, you need to create a new custom scene resolution.
Next Topic
Adding a Camera
Time Estimated 15 mins
Difficulty Level Beginner
Topics List
- About Cameras
- Adding a Camera
- Selecting the Active Camera
- About Pegs
- About Keyframes
- Adding Keyframes in the Timeline View
- Deleting Keyframes
- About Layer Parameters
- Enabling Constant Z
- Animating the Camera
- About Controls
- Displaying Controls
- Adding Control Points
- Setting Eases on Multiple Parameters
- Activity 1: Creating a Camera Truck-in
- Activity 2: Preparation and Preferences
- Activity 3: Multiplane Setup
- Activity 4: Camera Motion
- Activity 5: 3D Path Trajectories