- Modules
- Camera Motion with Harmony Premium
- Animating the Camera
Animating the Camera
T-HFND-009-009
A scene's camera can be manipulated and animated just like any other layer. It is listed in the Timeline view and you can use the same tools and selection modes to offset or animate it. However, the camera layer itself is static, which means it keeps the same position and angle throughout the whole scene. In order to be able to animate the camera, you need to connect it to a peg layer, which can be animated, and which will directly affect the position and angle of the camera.

You can animate your camera movements directly in the Camera view. Alternatively, you can use the Side or Top views, which can be especially useful when animating a camera in a multiplane scene, where each layer is positioned at a different distance from the camera
How to animate the camera
- In the Tools toolbar, enable the Animate
 mode.
mode.
- In the Tools toolbar, select the Transform
 tool or press Shift + T.
- In the Timeline view, select the Camera layer.

- From the Layers toolbar, click the Add Peg
 button.
A Peg layer appears directly above the Camera layer and is automatically attached to it. The new Peg layer takes the name of the camera layer with the suffix -P added to indicate that it is its Peg layer.

- On the right side of the Timeline view, on the Camera Peg layer, select the frame at which you want the camera movement to start.

- Do one of the following to add a keyframe:
- In the Timeline toolbar, click the Add Keyframe
button.
- Right-click and select Add Keyframe.
- Press F6.
A keyframe appears in that cell. Any frames preceding this keyframe cell will hold the same camera position as this keyframe.

- Do one of the following to move the camera:
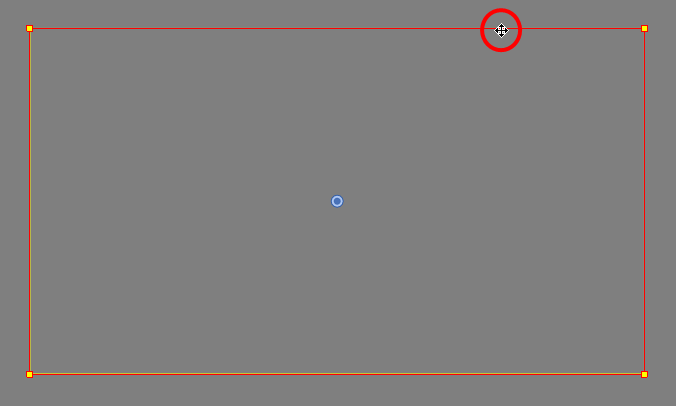
- In the Camera view, select the Camera, which is now be represented by a thin yellow rectangle with a red highlight, and move it to the desired position.

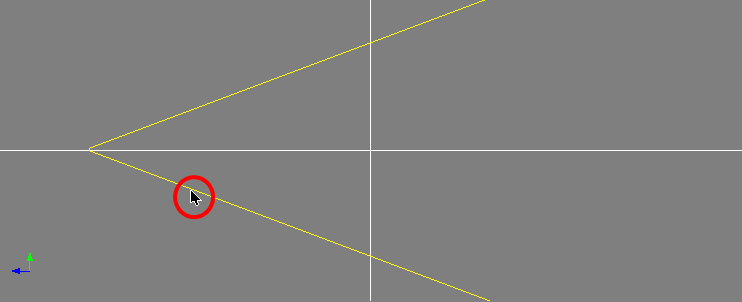
- In the Top or Side view, select the camera, which is now represented by a large, yellow V-shaped cone, and move it to the desired position.

- On the Timeline view, click on the cell where the camera movement will end.
- Do one of the following:
- In the Timeline toolbar, click the Add Keyframe
button.
- Right-click and select Add Keyframe.
- Press F6.
A keyframe appears in that cell.

- Select the camera in the Camera, Top or Side view and move it to the desired position.
- In the Timeline view, select the first frame to rewind to the beginning of your animation.
- In the Playback toolbar, click on the Play
 button to preview your animation.
Time Estimated 15 mins
Difficulty Level Beginner
Topics List
- About Cameras
- Adding a Camera
- Selecting the Active Camera
- About Pegs
- About Keyframes
- Adding Keyframes in the Timeline View
- Deleting Keyframes
- About Layer Parameters
- Enabling Constant Z
- Animating the Camera
- About Controls
- Displaying Controls
- Adding Control Points
- Setting Eases on Multiple Parameters
- Activity 1: Creating a Camera Truck-in
- Activity 2: Preparation and Preferences
- Activity 3: Multiplane Setup
- Activity 4: Camera Motion
- Activity 5: 3D Path Trajectories