- Modules
- Cut-Out and Node View Improvements with Harmony Premium
- Animate on Onion Skin Range
Animate on Onion Skin Range
T-H16NEW-002-003
In this topic, you will learn to use the Animate on Onion Skin Range option, which allows you to modify keyframes on a portion of the timeline defined by the onion skin.
- Author
- Kim Bussiahn
- Trainer and Content Creator
- toonboom.com
Material
To complete this topic, you will need the following from the sample material you downloaded:
-
MO-H16NEW-002\T-H16NEW-002-003\OS_Range_Edited
- MO-H16NEW-002\T-H16NEW-002-003\OS_Range_Unedited
How to move, rotate, scale or skew an element over a specific span of frames
-
In the Tools toolbar, select the
Transform tool.
TIPYou can also make transformations over several keyframes using theTranslate,
Rotate,
Scale,
Skew or
Maintain Size tools, which can be selected in the Advanced Animation toolbar.
-
In the Timeline
, Node or Camera view, select the element you want to transform.
-
In the Tools toolbar, click on the Animate mode button which, depending on the currently selected mode, will either have the
Animate Current Frame,
Animate Onion Skin Range or
Animate Off icon, and select
Animate Onion Skin Range in the pop-up menu.
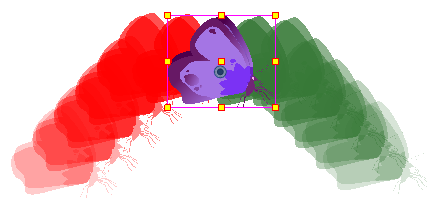
Animate Onion Skin Range is now enabled. At the same time, Onion Skin becomes enabled, and the Onion Skin handles appear left and right of the red playhead in the Timeline view.

-
In the Timeline view, move the timeline playhead to a frame somewhere in the middle of the span of frames you want to transform.

-
Adjust the range of the Onion Skin so that it covers every frame you want to apply the transformation to by doing one of the following:
- In the Timeline view, click and drag on the red onion skin marker to make it include the previous drawings you want to display in the onion skin, then click and drag on the green onion skin marker to make it include the next drawings you want to display in the onion skin.
-
Use the buttons in the toolbar above the drawing space to adjust how many previous and next drawings are included in the Onion Skin:
- To increase the amount of previous drawings to display, click on the
Add Previous Drawing button in the Camera/Drawing view toolbar.
- To decrease the amount of previous drawings to display, click on the
Remove Previous Drawing button in the Camera/Drawing view toolbar.
- To increase the amount of next drawings to display, click on the
Add Next Drawing button in the Camera/Drawing view toolbar.
- To decrease the amount of next drawings to display, click on the
Remove Next Drawing button in the Camera/Drawing view toolbar.
- To increase the amount of previous drawings to display, click on the
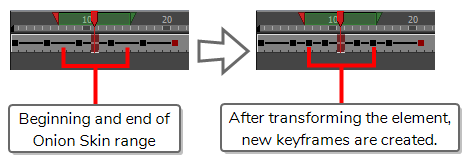
NOTEIf there are no keyframes at the beginning and at the end of the Onion Skin range, keyframes will be automatically created at those frames to store the transformation you will make. If you want to avoid this, make sure the Onion Skin range begins and ends on a keyframe.


The position of the layer in every frame in the Onion Skin range will appear in the Camera view, as Onion Skin.

-
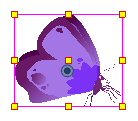
In the Camera view, use the Transform tool to move, scale, rotate or skew the selected element.
NOTES- For information on how to use the Transform tool to move, rotate, scale or skew an element, see About the Transform Tool .
- You can also use the Advanced Animation tools to move, rotate, scale and skew elements—see About Advanced Animation Tools.
The transformation is applied on every keyframe within the Onion Skin range on the selected layer.

Time Estimated 5 mins
Difficulty Level Beginner
Topics List
- Drawing Substitutions View
- Deformation Improvements
- Animate on Onion Skin Range
- Node View Organization
Support
Help and FAQ
Toon Boom Forum
Contact us