- Modules
- Introduction to Animation with Harmony Essentials
- Setting the Exposure
Setting the Exposure
T-HFND-006-009
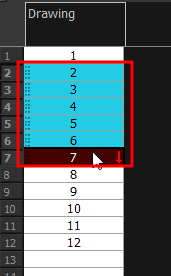
You can easily increase or decrease the exposure for a selected cell range.
How to set the exposure
-
In the Timeline or Xsheet view, select the cell range on which you want to set the exposure.


- Do one of the following:
- Select Animation > Cell > Set Exposure to > Set Exposure to 1, 2, 3, or Set Exposure.
- In the Timeline toolbar, click one of the Set Exposure


buttons. Note that you may have to add this button to your toolbar by right-clicking on it and selecting Customize.
- In the Xsheet view, right-click and select Exposure > Set Exposure to > Set Exposure to 1, 2, or 3, or Set Exposure.
- If you chose the Set Exposure option, the Set Exposure dialog box opens. Enter the number of frames you want the drawings to display and click OK.


Time Estimated 10 mins
Difficulty Level Beginner
Topics List
- About Paperless Animation
- Timeline View
- Xsheet View
- Extending the Exposure of Previous Drawings
- Using the Onion Skin
- Typing Exposure
- Creating Cycles
- Setting the Exposure
- Cleaning Animation
- Using the Light Table
- Activity 1: Rough Animation
- About Duplicate Layers
- Duplicating Layers
- About Colour Palettes
- About Colour Swatches
- Adding a Colour Swatch
- Adding a Gradient Colour Swatch
- Adding a Texture Colour Swatch
- Painting Multiple Drawings
- Activity 2: Changing the Colour of the Animation
- Activity 3: Adding a Colour Card and Exporting