- Modules
- Keyframing Animation with Harmony Premium
- Animating with Keyframes
Animating with Keyframes
T-ANIMCO-001-005
You can animate a layer or a peg by creating keyframes and moving your drawings in the Camera view.
How to animate a layer or a peg
- In the Tools toolbar, select the Transform
 tool or press Shift + T.
- If your layer has a parent peg and you want to animate the drawing layer directly, make sure the Peg Selection Mode
 is disabled in the Tool Properties view.
- In the Tools toolbar, enable the Animate
 mode. This allows the Transform tool to affect the position and size of a layer at the current keyframe only, whereas it would otherwise affect the layer's position and size throughout the whole scene.
 - In the Timeline view, go to the first frame.

- From the top menu, select Animation and make sure the Stop-Motion Keyframe option is unchecked. This will make it so Harmony automatically creates the animation between the animation keyframes you create.
- Select the cell where you want to create your first keyframe
- To create your first keyframe, do one of the following:
- In the Timeline toolbar, click the Add Keyframe
button.
- Right-click and select Add Keyframe.
- Press F6.
A keyframe is created on the first frame of the Timeline view.

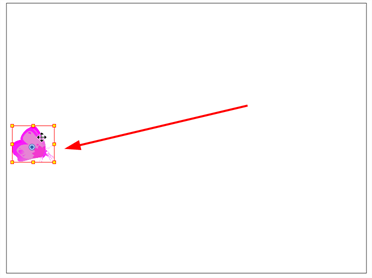
- In the Camera view, select the element to animate and move it to its first position.
- In the Timeline view, go to the frame on which you want to set the second position.

- Select the cell where you want to create your second keyframe. right-click on the selection and select Insert Keyframe.
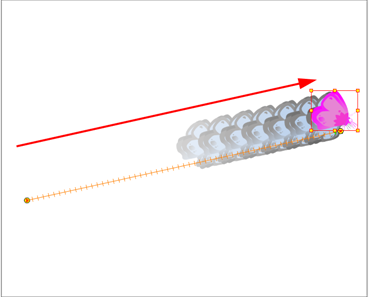
The second keyframe appears in the Timeline view, along with a line going from your first keyframe to your second keyframe. This indicates that every frame in-between will be animated by Harmony.

- In the Camera view, move the element to its second position.
- In the Timeline view, select the first frame to rewind to the beginning of your animation.
- In the Playback toolbar, click on the Play
 button to preview your animation.
Time Estimated 10 mins
Difficulty Level Beginner
Topics List
- About Pegs
- Adding Pegs
- About Drawing Layers
- About Layer Parameters
- Setting Layer Parameters
- Displaying Layer Parameters
- About Keyframes
- Adding Keyframes in the Timeline View
- Deleting Keyframes
- Animating with Keyframes
- Switching Keyframe Types
- About the Animate Mode
- Activity 1: Keyframing
- About Velocity
- Setting Eases on Multiple Parameters
- Activity 2: Easing
- Activity 3: Large Easing
- Activity 4: Small Easing
- Activity 5: Overshooting