- Modules
- Master Controllers on Rigs
- Using the Interpolation Grid Wizard
Using the Interpolation Grid Wizard
T-RIG3-008-006
Before using the Interpolation Grid, you must create all the poses required for your Master Controller. To do this, you can create a scene with your character rig in it, and put each possible pose for your character on a different frame of the scene. The Interpolation Grid will use the frame number of each frame containing a pose as an identifier for the pose.
Once your character's key poses are properly laid out in your scene's timeline, the next step is to select the nodes which you intend to animate with the Master Controller in the Node view, then launch the InterpolationGrid script. This script will open a dialog which will allow you to associate parts of the interpolation grid to frames in your scene.
Material
To complete this topic, you will need the following from the sample material you downloaded:
-
MO-H16NEW-003\WithMC_Basketball
- MO-H16NEW-003\WithoutMC_Basketball
How to generate a 2D point Master Controller using the Interpolation Grip wizard
- Make sure your rig as well as your key poses are inside a group with a Composite nodeAbout Rig Structure and Master Controllers
-
Prepare all the poses you need to provide to the Interpolation Grid Wizard.
- Calculate the centre point and cell size of the Interpolation Grid you want to create.
-
In the Node or Timeline view, select all the layers that you want the 2D point Master Controller to control.
 NOTES
NOTES- If you select a group, everything inside the group will be added to the list of layers controlled by the Master Controller.
- If you select a collapsed peg in the Timeline view, its children will not be added to the list of layers controlled by the Master Controller. You must expand the peg and select its children as well.
- Do one of the following to add the Master Controller toolbar to your workspace:
- Right-click on an existing toolbar and select Master Controller.
- In the top menu, select Windows > Toolbars > Master Controller.
The Master Controller toolbar appears.

-
In the Master Controller toolbar, click on the
Interpolation Grid Wizard button.
The Interpolation Grid dialog appears.
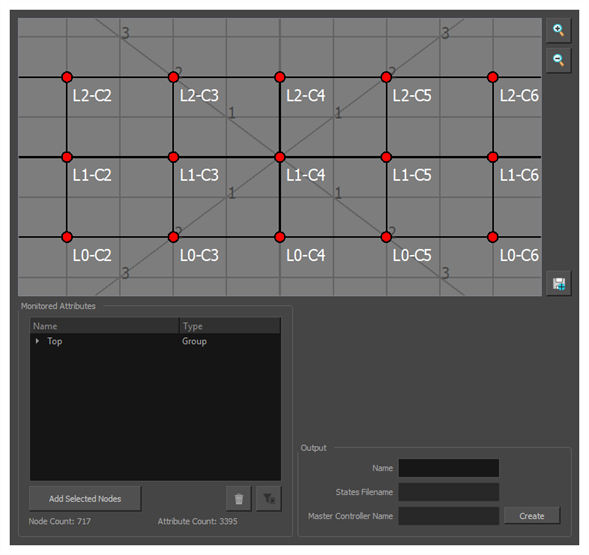
The Grid Parameters dialog appears just over it. This dialog is used to specify the width, height and, optionally, the centre point and cell size for your grid.
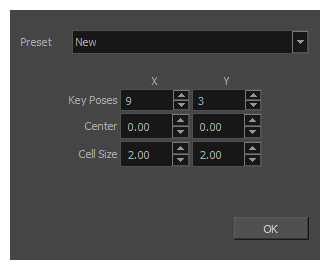
- If you already created a proper Interpolation Grid preset for your purpose, select it in the Preset field. Otherwise, skip this step.
- In the Key Poses fields, type in the amount of horizontal poses per row under X, and the amount of vertical poses per column under Y.
-
If you calculated the desired centre position of your Interpolation Grid, type in its centre coordinates in the Center fields. Type in its horizontal position in fields under X and its vertical position in fields under Y.
NOTE You can skip this step if you prefer. If you do, the default position of your 2D point widget will be the centre of your scene.
-
If you calculated the optimal cell size for your Interpolation Grid, type it in the Cell Size fields. Type its horizontal cell size in fields under X and its vertical cell size in fields under Y.
NOTE You can skip this step if you prefer. If you do, the default size of each cell in your interpolation grid will be 2 horizontal fields × 2 vertical fields.
-
Click on OK.
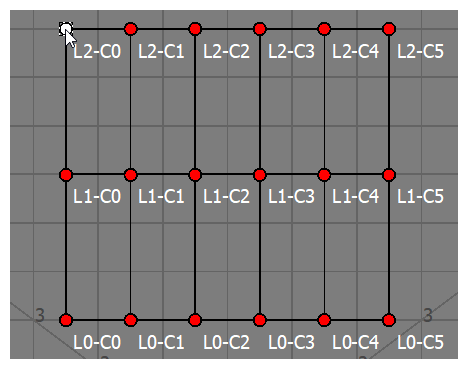
The dialog will close and you can now use the Interpolation Grid dialog. In the top half, the grid view displays the Interpolation Grid you just configured, with each point represented by a red dot.
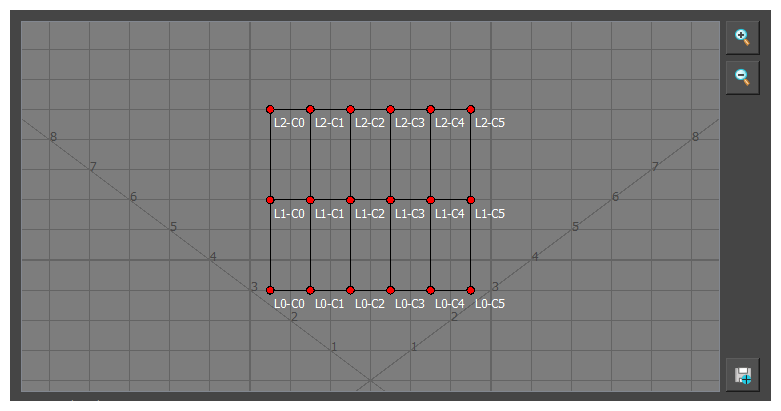
- If needed, adjust the grid view to see the entire grid:
- To pan the view, click and drag on it.
- Click on the
Zoom In button right of the grid view to zoom in on the grid or on the
Zoom Out button to zoom out from the grid.
-
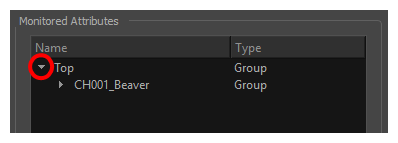
In the Monitored Attributes list, expand the Top item.
You will see all the nodes you had selected, in a group-based hierarchy. These nodes will be controlled by your Master Controller.
-
If you want to add nodes to the list of nodes that will be controlled by the Master Controller, select these nodes in the Timeline or Node view, then, in the Monitored Attributes section, click on the Add Selected Nodes button.
- If you want to remove nodes or attributes from the list, select them in the list, then click on the
Remove Selected Items button.
-
-
In the Timeline view, click and drag the playhead until you find the pose you want to associate with the top-left point, then make note of the frame number.
NOTE Even while the Interpolation Grid dialog is open, you can click and drag on the playhead in the Timeline view to preview different frames and find the frame containing the right pose.
-
In the Visual Grid area, click on the top-left red point.
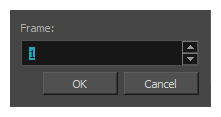
A Select Frame dialog appears.
-
Type in the frame number of the pose that you want to associate with this point.
-
Click on OK.
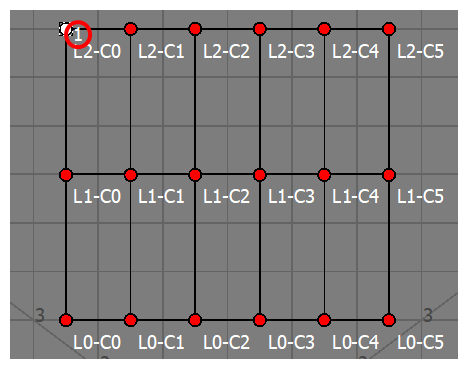
In the Grid View, the frame number appears just right of the selected point.
 TIP
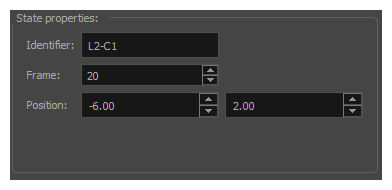
TIPWhile a point is selected, you can update its Frame number and customize its identifier and its position in the grid in the State properties section.
-
Repeat the last three steps for each point in the grid until every point is associated with a frame number. A point that is assigned to a pose will appear in green, whereas points that are not appear in red.
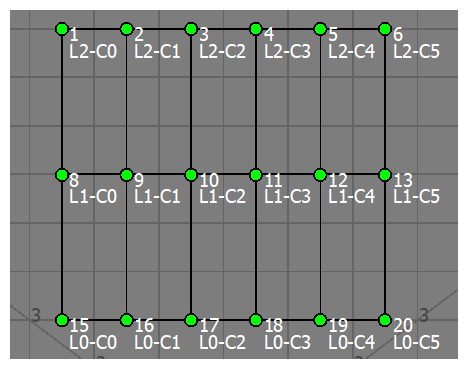 NOTE You must associate every point with a pose before you can create your 2D Master Controller.
- Once you are done configuring every point in your grid, if you want to re-use the same grid for other characters later, click on the
Create Grid Preset button to save the grid as a preset. You will be prompted to type in a name for your grid preset. Later, you can select this preset from the Grid Parameters dialog when you launch the Interpolation Grid Wizard.
- Under the Monitored Attributes list, click on the
Filter Attributes button to remove any nodes or attributes that do not change in any of the poses you added to the grid. This will optimize the performance of your Master Controller.
- In the Output section, in the Name field, type in the name you want to give to your Master Controller.
- Click on the Create button.
-
A dialog prompting you to select a Composite will appear. In this dialog, select a Composite inside the group for your character rig. This will create the Master Controller inside your character rig's group, ensuring that it is always copied over with your character when you create templates and import them into scenesAbout Rig Structure and Master Controllers

- Click on OK.
-
A Save dialog appears. It prompts you to select where to save the database file in which the character's poses will be saved. The dialog will open in the scene's scripts sub-directory by default and will give the database file a name based on the Master Controller's name. Hence, you can just click on Save right away.
Your Master Controller has now been created and is added to your scene, connected to the Composite you selected earlier.
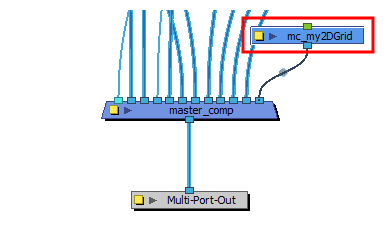
The Master Controller's 2D point widget is visible in the Camera view.

-
In the Timeline view, move the timeline cursor to a frame that does not contain any of the key poses you used, so as to not override one of your poses.

-
In the Camera view, click and drag on the 2D point widget to test your Master Controller.
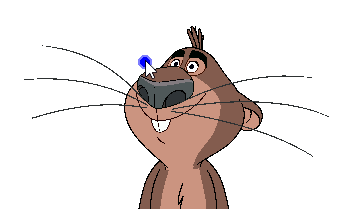
At any time, you can show or hide the MasterController's widget by selecting it in the Timeline or Node view, then doing either of the following:
- In the Camera view toolbar, click on the
Show Control button.
- In the top menu, select View > Show > Control.
Time Estimated 10 mins
Difficulty Level Advanced