- Modules
- Project Creation with Harmony Advanced
- Creating Scenes
Creating Scenes
T-HFND-001-005
All scenes created via Harmony Stand Alone are independent and local to the computer. You can create or open a scene using the Welcome screen or the File menu.
If you are using Harmony Server, you must use the Control Center application to create your scenes before you can open them in Harmony. Harmony Server scenes cannot be created directly in Harmony.
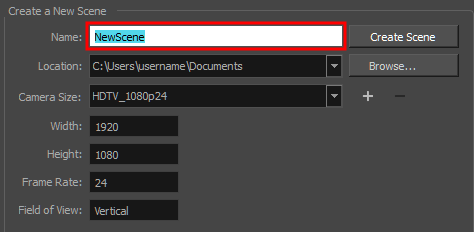
How to create a scene from the Welcome screen
- In the Name field, type the scene’s name.

NOTE: The scene name should not exceed 23 characters and cannot contain special characters, such as *&^%!.
- To decide in which directory the scene will be created, click the Browse button next to the Location field.

- From the Camera Size menu, select a scene resolution.

- Click on Create Scene.
A new scene is created.
How to create a new scene from the File menu
- Do one of the following:
- From the top menu, select File > New.
- In the File toolbar, click the New
button.
- Press Ctrl + N (Windows/Linux) or ⌘ + N (macOS).
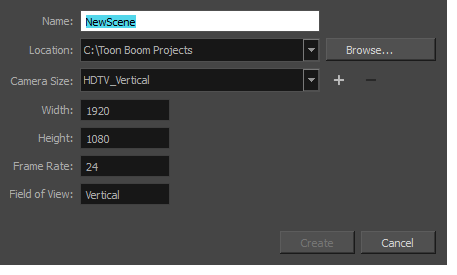
The New Scene dialog box opens.

- In the Project Name field, type the scene's name.

- Select a scene directory by clicking the Browse button.

- In the Resolution window, select the scene’s resolution and click Create.
A new scene is created.
Next Topic
Creating Custom Resolutions
Time Estimated 10 mins
Difficulty Level Beginner