Using the Blur Radial Zoom Effect
T-COMP2-003-006
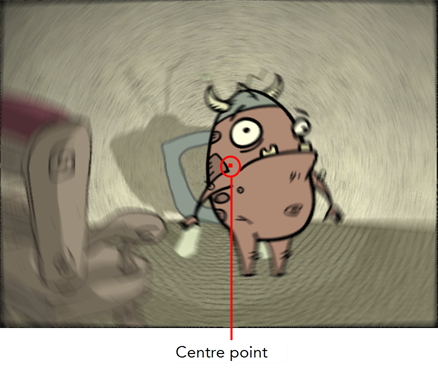
The Blur - Radial Zoom effect creates blurs around a centre point, simulating the look of a zooming or rotating camera. You can use a matte to isolate the area of the image from which you want the effect to radiate from. For example, in the illustration below, a circular matte was created to mask the eyeball and a Negate effect was applied so the blur is outside the matte. Then the centre point was positioned on the character's iris, which is the centre of the matte.
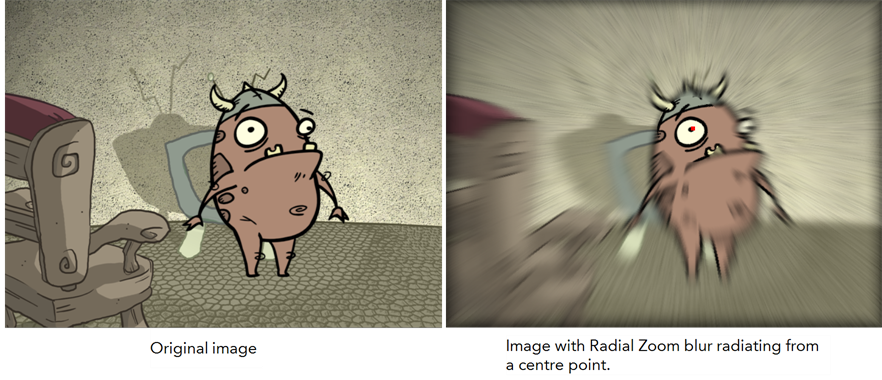
For detailed video tutorials and sample scenes by Adam Phillips, see toonboom.com/resources/video-tutorials/chapter/adam-phillips-harmony-effects.
To learn about the Blur Radial Zoom parameters, see Blur - Radial Zoom Node.
How to use the Blur Radial Zoom
- In the Camera view, enable the Render mode.
- From the Node Library view, drag a Blur Radial Zoom node to the Node view.
- Connect your drawing to the Blur Radial Zoom's right port.
- Connect the Blur Radial Zoom node to the Composite node.
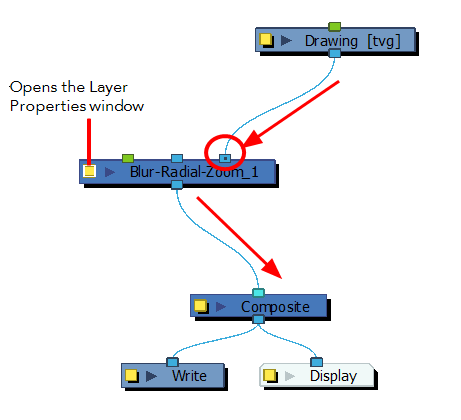
- On the Blur Radial Zoom node, click the yellow square properties button to open its property editor.
- In the Layer Properties windowo, increase the Blurriness value.
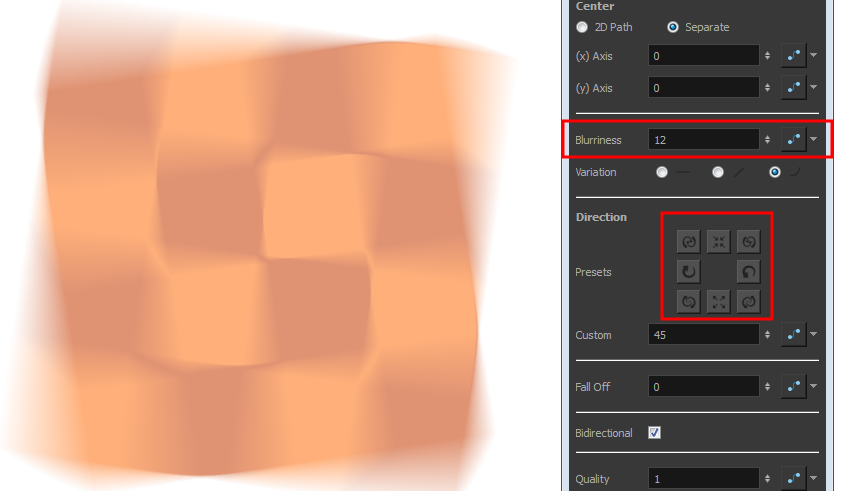
- In the Direction section, click on any of the direction presets to modify the blur spin or zoom.
How to create a radial-zoom blur around an isolated area
- Connect a drawing and a background image to a Composite node.
- Connect the Composite node to the Blur-Radial Zoom node.
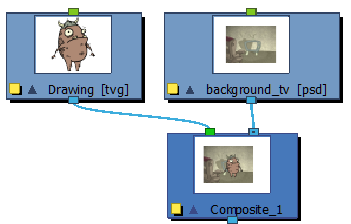
- Connect a Blur-Radial-Zoom node to the Composite node and add the Write and Display nodes.
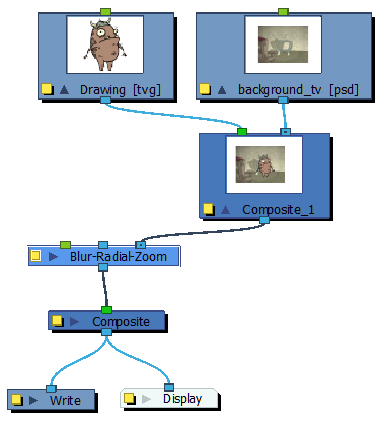
- Create a matte to isolate an area of the image. In the Timeline view, click the Add Layers
 button and select Drawing. Give the layer a name, such as Mask.
- In the Drawing view, draw a filled shape.
- The blur should radiate outwards from the mask. To do this, connect a Negate node to the mask. In the Negate properties, select the Negate Colour and Negate Alpha options. Deselect the Negate Colour Clamp to Alpha option.
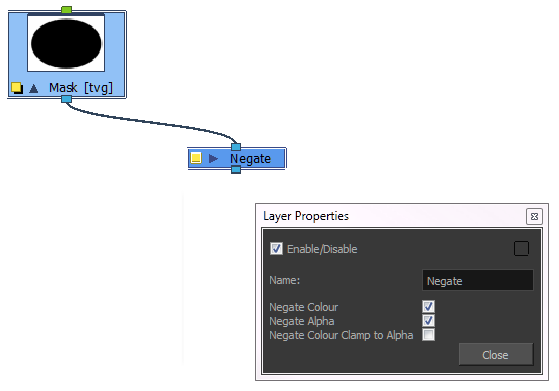
- Connect these nodes to the rest of the tree. Your node structure should look like this:
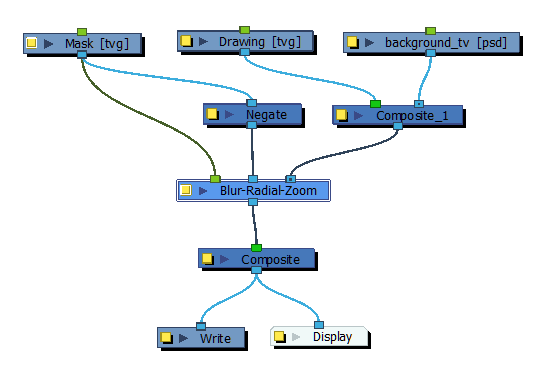
- In the Blur - Radial Zoom property editor, Center section, select one of the following options:
- 2D Path: Lets you move the centre point visually in the Camera view.
- Separate: Lets you control the x and y axis by entering values in the fields or by moving the centre point in the Camera view.
- Set a value for the Blurriness.
- With the Blur - Radial Zoom node selected in the Node view, select View > Show > Control or press Shift + F11.
A red centre point appears in the centre of the Camera view.
- In the Tools toolbar, select the Transform
 tool.
tool.
- Click the Animate Mode
 button in the Tools toolbar if you want to create function curves to keyframe over time. Otherwise, values will be created for the duration of the scene.
- Move the centre point to the desired position. In our example, the centre was moved to the centre of the mask.
- In the Node view, select the mask you created.
- In the Camera view, move the mask to the desired position.
- Continue to adjust the blur values until you achieve the desired effect.
Time Estimated 10 mins
Difficulty Level Intermediate