- Modules
- Keyframing Animation with Harmony Advanced
- About Layer Parameters
About Layer Parameters
T-HFND-009-008
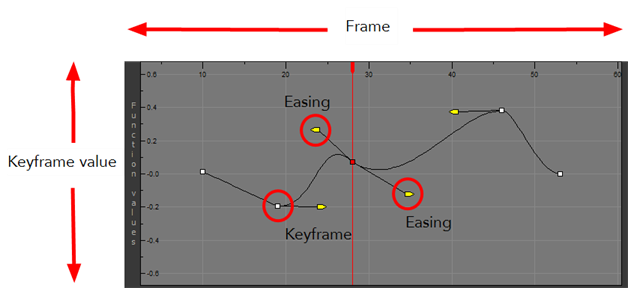
A layer is composed of many customizable parameters, such as the X, Y and Z positions, angle (rotation), skew and scales. Each parameter has its own function which is a mathematical formula expressing the relationship between position values. You can view each function on a graph as a simple curve, such as the one below.

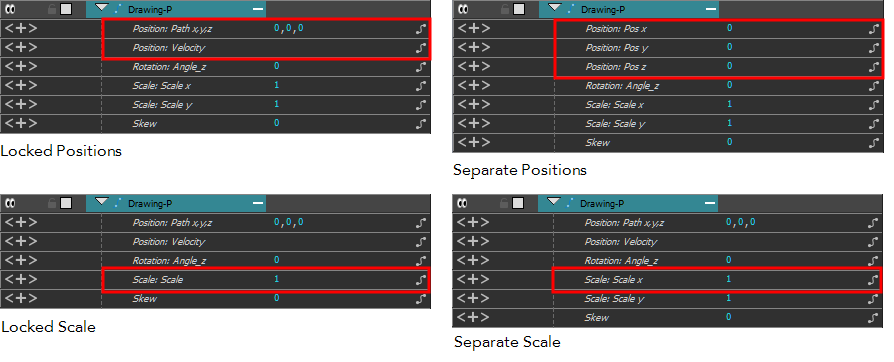
There are several options available for setting up function parameters:
- Locked Positions (3D Path)
- Separate Positions
- Locked Scales
- Separate Scales

You must select 3D Path, Separate Positions, Separate Scale, or Locked Scale before starting the animation. When you lock or unlock parameters, this does not convert the functions from one to the other, but creates new ones.
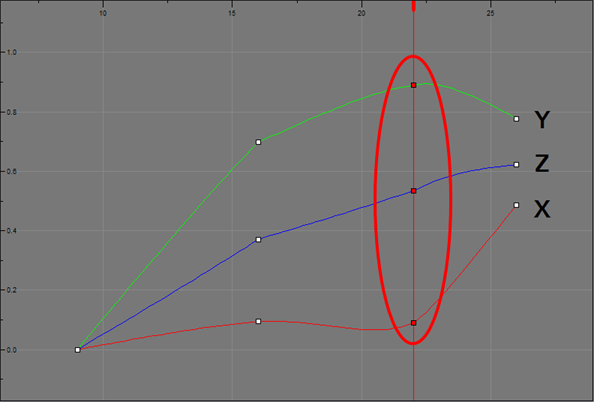
In a 3D Path, the X, Y and Z curves are locked together and controlled by a single velocity function. When you add a keyframe, it is added on all three trajectories at once, as is the velocity. This is very useful for long, smooth trajectories.

When using a 3D path, the X, Y and Z functions work together using the same keyframes. This allows for the velocity to control the curve and create a smooth trajectory. Even if a function does not have any variation on its curve (for example, all keyframes are at zero), the velocity might add a slight motion to ensure a smooth trajectory. This can cause elements that are very close to each other on the Z-axis to pop in front of one another. This is why in cut-out animation it is recommended to use separate position settings. But if you work with 3D path, you can use the Constant Z feature to avoid this from happening.
The Constant Z feature is used when creating motion keyframes. The Z function will use stop-motion keyframes and will not be interpolated, which can be very useful for cut-out animation. The Constant Z feature only works with 3D paths.
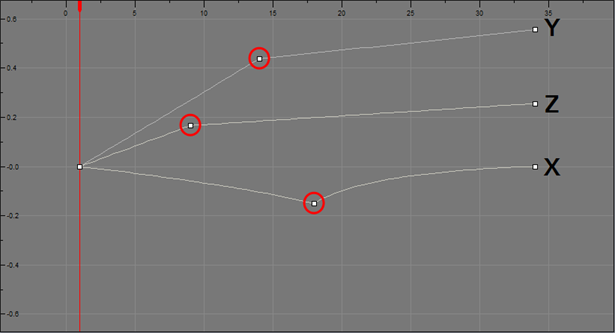
When the Separate Positions option is used, the X, Y and Z curves are independent and have velocity controls directly on their function curve. This is useful when you want to set keyframes on one of the curves without affecting the others.

When using the Scale parameter, you can use a single function curve to control both the vertical and horizontal scale, or two separate scales. When using a single function curve, the values are the same for the X (horizontal) and Y (vertical) axes for uniform size changes without distortion. However, if you separate the scale functions, you can squash, stretch and skew your elements.
Time Estimated 10 mins
Difficulty Level Beginner
Topics List
- About Pegs
- Adding Pegs
- About Drawing Layers
- About Layer Parameters
- Setting Layer Parameters
- Displaying Layer Parameters
- About Keyframes
- Adding Keyframes in the Timeline View
- Deleting Keyframes
- Animating with Keyframes
- Switching Keyframe Types
- About the Animate Mode
- Activity 1: Keyframing
- About Velocity
- Setting Eases on Multiple Parameters
- Activity 2: Easing
- Activity 3: Large Easing
- Activity 4: Small Easing
- Activity 5: Overshooting