- Modules
- Animation Principles
- Activity 1: Experimenting with Space and Time
Activity 1: Experimenting with Space and Time
T-PRIN-004-012
This exercise allows you to experiment with the effect of spacing on the timing of an animation.

Material
The sample material contains drawings of a ball as it rolls. Each layer displays drawings at different positions on the path of action to illustrate the effect that spacing has on timing. Only the "mechanical" layer is displayed by default.
In the "mechanical" layer, each position of the ball is displayed over 21 frames. Use the drawings in this layer to experiment with spacing.
The other layers show the different timing setups, so you should not look at them until you have finished your experiments.
You should not look at these until you have finished your experiments!
- MO-PRIN-004/01-mechanical.tpl
- MO-PRIN-004/02-ease-in.tpl
- MO-PRIN-004/03-ease-out.tpl
- MO-PRIN-004/04-anticipation.tpl
- MO-PRIN-004/05-choppy.tpl
How to begin the experiment
- Start Harmony.
- In the Welcome screen, do the following:
| ‣ | Browse to the location specified by your teacher. This is where your project will be saved. |
| ‣ | Name your project: Timing followed by your initials. |
| ‣ | Make sure NTSC is selected in the Resolution List. |
| ‣ | Click Create. |
- Save
 your project.
- Click the Library tab to display the Library view.
- From the Timing folder, select and drag the 01_Mechanical.tpl template to the Camera view.
- In the Playback toolbar, click the Play
 button to look at the ball rolling. Notice that it rolls at a constant speed.
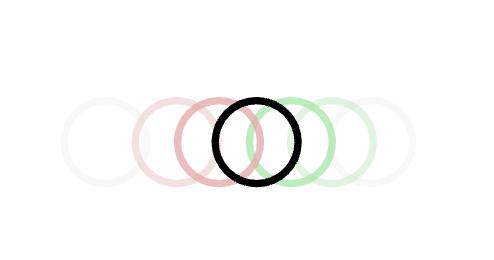
- On the Mechanical layer, click the Onion Skin
 button and extend the blue marker.

Notice that all the ball drawings are distributed equally with the same space between each of them.
- In the Timeline view, duplicate the Mechanical layer and name it Experiment_01.
- In the Timeline view, select all the exposed drawings (grey rectangles) of the Experiment_01 layer and press Delete.

NOTE: All the drawings are still stored within the layer; they are just not exposed.
- Disable the Mechanical layer or it will display in the Camera view.
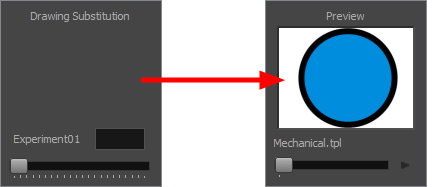
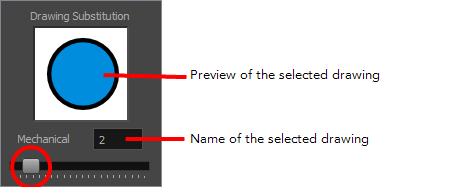
You will use the Drawing Substitution section in the Library view to fill the exposure in the Experiment_01 layer.
- In the Timeline view, select the first frame of the Experiment_01 layer.

- In the Library view, notice that the Preview section changed for the Drawing Substitution section.

- Use the slider to select the drawing you want to expose.

- In the Timeline view, notice that a grey rectangle appeared. It is the selected drawing.

- Select the next frame you need to change the exposure on and use the Substitution slider to select a drawing.

- If the segment between the 2 drawings did not fill automatically, select the in-between cells and, in the Timeline View toolbar, press the Fill Empty Cells to extend to first drawing's exposure.

- Try filling up the following exposures. Duplicate the Mechanical layer 3 more times:
- Experiment01 (Ease-in):

- Experiment02 (Ease-out):

- Experiment03 (Anticipation):

- Experiment04 (Choppy):

After you've completed the four experiments, you can import the four other templates in the Library view to compare them with your work.
- 02-ease-in.tpl
- 03-ease-out.tpl
- 04-anticipation.tpl
- 05-choppy.tpl
Next Topic
Activity 2: Drawing a Pendulum
Time Estimated 30 mins
Difficulty Level Beginner
Topics List
- Introduction to Animation Principles
- Squash and Stretch Principle
- Timing Principle
- Anticipation Principle
- Straight Ahead and Pose-to-Pose Principle
- Follow Through Principle
- Arcs of Rotation Principle
- Slow-in and Slow-out Principle
- Secondary Action Principle
- Exaggeration Principle
- Solidity Principle
- Activity 1: Experimenting with Space and Time
- Activity 2: Drawing a Pendulum
- Activity 3: Animating the Playground (Optional)
- Activity 4: Observation and Timing
- Activity 5: Drawing a Bouncing Basket Ball and Bowling Ball
- Activity 6: Animating a Bouncing Ball with a Tail