- Modules
- Animation Principles
- Activity 6: Animating a Bouncing Ball with a Tail
Activity 6: Animating a Bouncing Ball with a Tail
T-PRIN-004-017
In this exercise, you will add life to a bouncing ball. Turn your ball into a character by adding an appendage that will drag and overlap during the course of the animation. It could be a tail, ears, a cape...you choose!
Material
You can download the provided sample material for this module and use the following templates to use as a reference to compare with your final sketch. Don't forget to unzip (uncompress) the files before placing them in your library.
- MO-PRIN-004/13-tail-path.tpl
- MO-PRIN-004/14-ball-animation-rough.tpl
- MO-PRIN-004/15-ball-animation-clean.tpl
How to animate a bouncing ball with a tail attached
- Start Harmony.
- In the Welcome screen, name your project: Ball_with_a_tail.
- In the Timeline view, create a new drawing layer
 and name it: Tail_Path.
 - Create another new drawing layer
 and name it: Ball_Animation_Rough.

- Using the Brush
 tool, draw the path of action for your character, including the timing in the Path element.
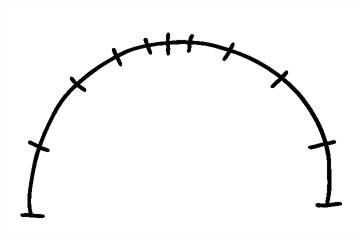
Now you need to extend the exposure of the path cell drawing you just did.
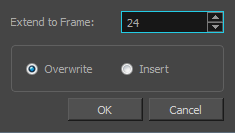
- In the Timeline view, click the drawing cell, then right-click and select Extend Exposure.
The Extend Exposure dialog box opens.
- In the Extend to Frame field, type 24. This is the number of frames you want to extend the cell to.
NOTE: If you have issues with the previous steps, you can import the 13-tail-path.tpl template.
- Use the Brush
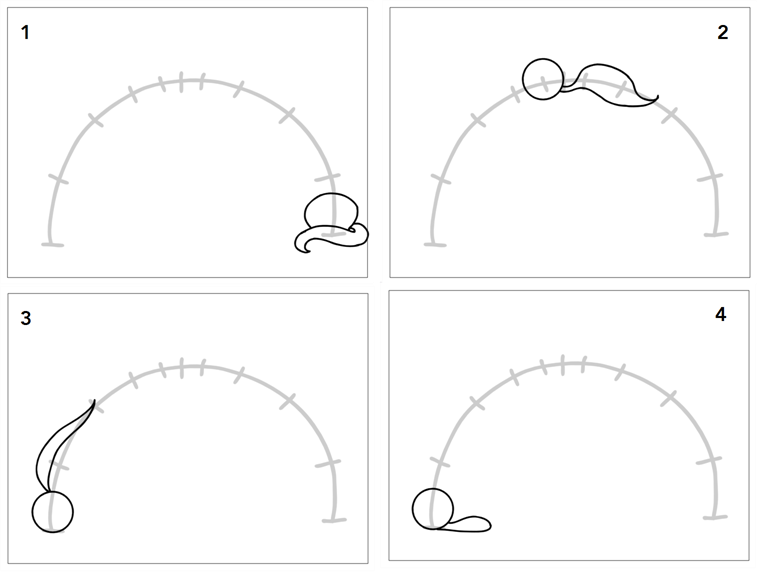
 tool to draw the key poses for your character in the Ball_Animation_Rough layer. Start by drawing the ball, then drawing the tail. Remember, because of the overlapping action, the tail will be dragged along by the ball and should be animated to show this.
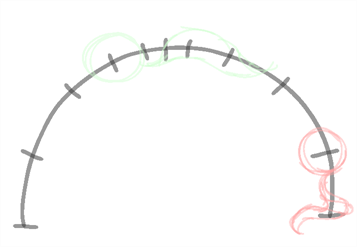
- In the Tools toolbar, click the Onion Skin
 button to see the previous and next frames of your animation, so you can draw the in-betweens. In the Timeline view, you can move the blue handles on each side to include the frames you need in the onion skinning option.

- Make sure to save the progress of your work by clicking the Save
 button.
NOTE: If you have issues with the previous steps, you can import the 14-ball-animation-rough.tpl template.
- Play back
 your animation and test/correct your work. You can also activate the Loop
  button to view your animation in loops while noting the corrections you have to do.
When you start an overlapping animation, remember that an element like a tail will not start moving before the ball has moved a few frames.

When you reach the middle of the animation, the ball will reach the peak of its climb and start to slow down. Always remember that the tail is a few frames late, so it will be squashed against the ball in the middle frame and be stretched again on the next frame while keeping the same position on the guide.
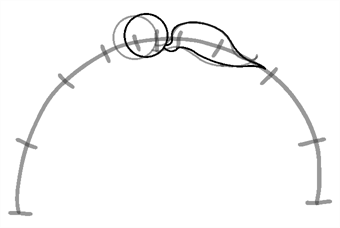
At the end of the animation, the ball will stop moving, but the tail’s overlapping animation will continue until it drops to the floor.

NOTE: If you have issues with the previous steps, you can import the 15-ball-animation-clean.tpl template.
Time Estimated 30 mins
Difficulty Level Beginner
Topics List
- Introduction to Animation Principles
- Squash and Stretch Principle
- Timing Principle
- Anticipation Principle
- Straight Ahead and Pose-to-Pose Principle
- Follow Through Principle
- Arcs of Rotation Principle
- Slow-in and Slow-out Principle
- Secondary Action Principle
- Exaggeration Principle
- Solidity Principle
- Activity 1: Experimenting with Space and Time
- Activity 2: Drawing a Pendulum
- Activity 3: Animating the Playground (Optional)
- Activity 4: Observation and Timing
- Activity 5: Drawing a Bouncing Basket Ball and Bowling Ball
- Activity 6: Animating a Bouncing Ball with a Tail