- Modules
- How to Draw and Animate With Harmony Premium
- Rigging with Deformers
Rigging with Deformers
T-HTRIAL-002-007
In this exercise we will apply a kinematic output node to linking the feet to the legs.
Author
- Jesse J. Jones
- 2D Animator, Artist and Tutor
- jessejayjones.com
How to create a Bone deformer
- Once your element is selected, select the
Rigging tool in the Deformation toolbar.
- In the Tool Properties view, enable the
Bone mode
or the .Game Bone mode, depending on whether you're rigging for an animation project or a game
- In the Tool Properties view, enable the
Automatically create a group when creating a new deformation rig option so that your deformation chains are created inside groups. Every point in a deformation chain is an individual layer, so creating deformers with this option disabled is liable to clutter your Timeline and Node view.
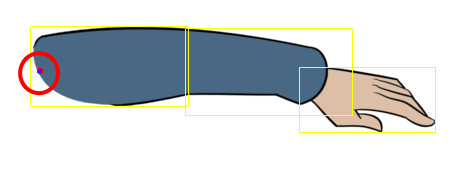
- Place the cursor at the root of your drawing or drawing hierarchy, click once and release. For example, if you're creating a deformer for a whole arm, click on the shoulder joint.
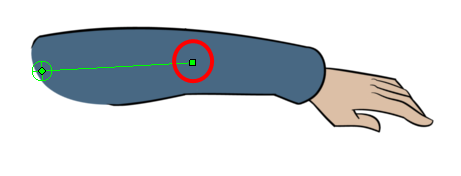
- Move your cursor at the location where you want your first bone to finish and your second bone to start, and click again. An articulation control point will automatically be inserted between each bone you create.
- Move your cursor where you want the next articulation to be and click to create the next point.
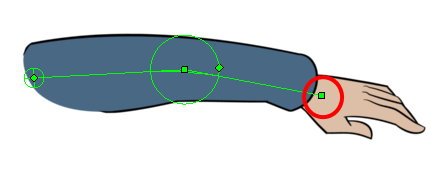
Observe that, as you create a new point, the previous point now has a circle around it. This is the radius of the articulation, which allows you to determine how much of the drawing should be part of the articulation. Every point in a bone deformer, except for the first and the last one, has a radius setting.
- Click and hold the previous articulation's radius manipulator and adjust the articulation's radius so that it covers the limb.
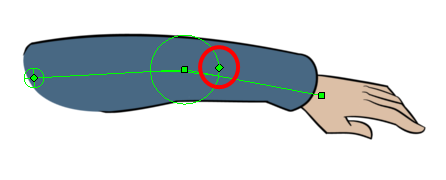
- Repeat this until you are finished creating the Bone chain. Make sure you build each articulation in the right order going from the root to the extremity.
How to create a Curve deformer
- Once your element is selected, select the
Rigging tool in the Deformation toolbar.
- In the Tool Properties view, enable the
C urve mode.
- In the Tool Properties view, enable the
Automatically create a group when creating a new deformation rig option so that your deformation chains are created inside groups. Every point in a deformation chain is an individual layer, so creating deformers with this option disabled is liable to clutter your Timeline and Node view.
- Place the cursor at the root of your drawing or drawing hierarchy. For example, if you're creating a deformer for a whole arm, place your cursor over the shoulder joint.
- Press and hold the mouse button to create the point, then drag to towards the direction where you want your curve to bend to set the position of this curve's bezier handle, just as you would when drawing a curve using the Polyline tool
—see Creating Vector Shapes with the Polyline Tool .
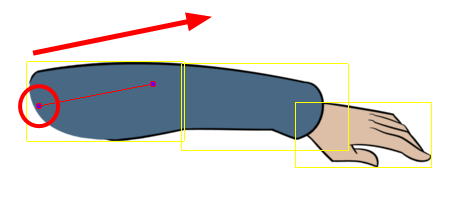
- Click again at the location where you want the curve to end and drag backwards to extend the second bezier handle.
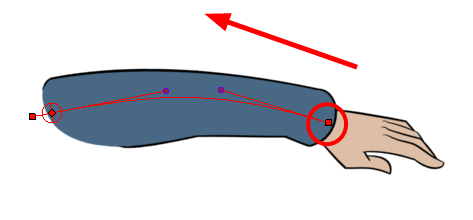
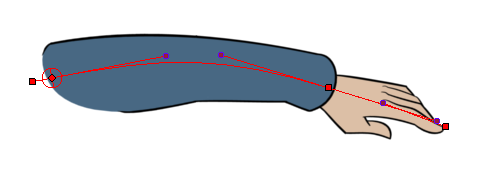
- As you go, you can use your mouse cursor to reposition the existing bezier handles as needed. You can hold down the Alt key if you wish to move a point's bezier handle without affecting the bezier on the opposite site of the point.
- Repeat this process until you have finished building the Curve chain.
Time Estimated 15 mins
Difficulty Level Beginner