Activity 1: Creating a Custom Workspace
T-SBFND-003-013
Working with the empty project you created in the previous module, you will be creating a custom workspace, one that contains only the views, toolbars and other elements you want. Take a moment to think about a task you perform often, such as sketching, and jot down the names of the views you use frequently.
You will also be eliminating the elements of the interface you don't often use. This will streamline the interface and make it easier for you to be efficient. Take a look at the interface and identify the areas you are not using.
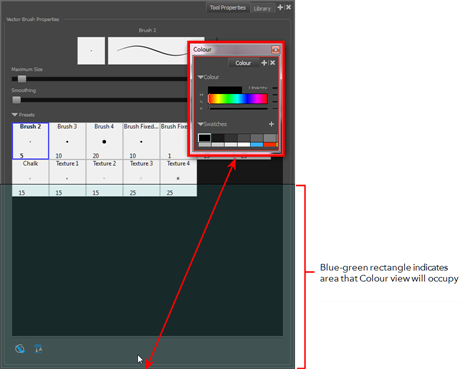
When you are moving views around in the interface, blue-green areas are highlighted to indicate that you can dock them to a particular location.
How to create a custom workspace
- Here is the custom workspace you will create. It is optimized for drawing.
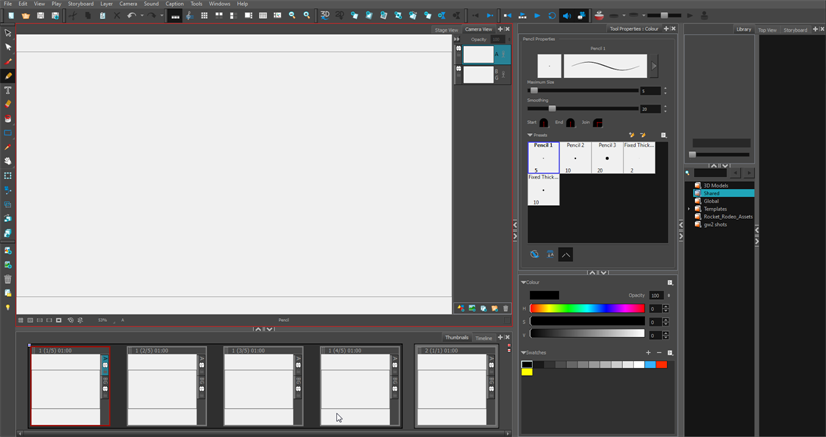
Working from the default workspace, here are the changes you will make:
- Add the Timeline view in the same area as the Thumbnails view (at bottom of the interface).
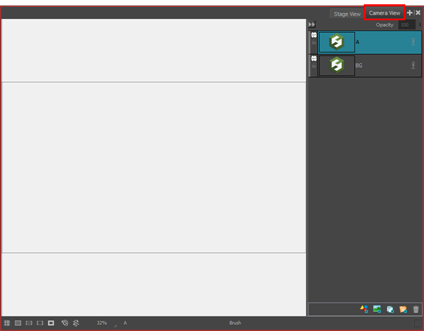
- Add the Camera view in the same area as the Stage view.
- Remove the Storyboard and Panel views from the right side of the workspace.
- Separate the Tool Properties/Colour and Library views and stretch them vertically to show all its properties.
- Select Windows > Workspace > Workspace Manager.
- In the Available Workspaces list on the left side of the Workspace Manager, select the Drawing workspace. You will use this workspace as your base and customize it.
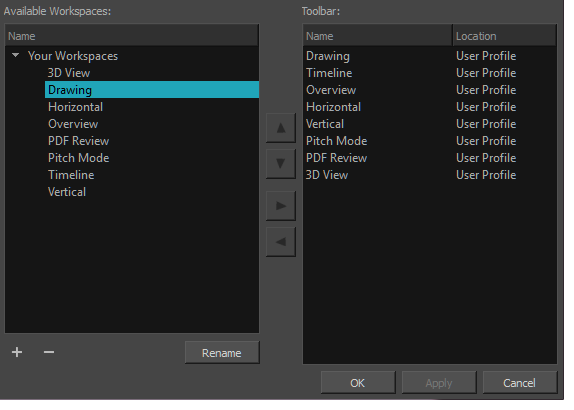
- At the bottom of the Available Workspaces list, click the Add
 button to add a workspace.
- Select the new workspace you created, then click Rename and give it a new name, such as My Workspace, and press Enter/Return.
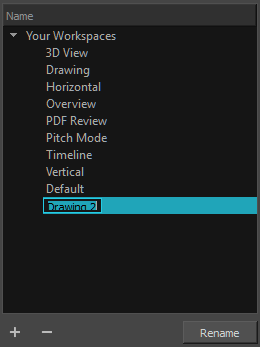
- Select the new workspace and click the Right Arrow
 button to send it to the Workspace toolbar.

- Click OK
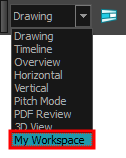
- To quickly access workspaces, you will need to display the Workspace toolbar as it is not part of the default workspace. Select Windows > Toolbars > Workspace.
The Workspace toolbar displays at the top of the interface.

- To display the new workspace you created, use the Workspace menu and select your new workspace.
-
Now you will add some views to your workspace.
- In the upper-right corner of the Thumbnails view, click the View Menu
button and select Timeline from the list.
The Timeline view is added and displayed in the same area as the Thumbnails view. You can switch back and forth between the two views by clicking its tab.
- Go ahead and add the Camera view in the same area as the Stage view.
- Next, you will close some views. In the upper-right side of the interface, select the Panel view and click the Close View
 button. Do the same for the Storyboard view. This area should now contain only the Tool Properties/Colour and Library views.
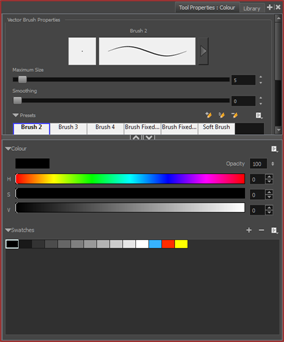
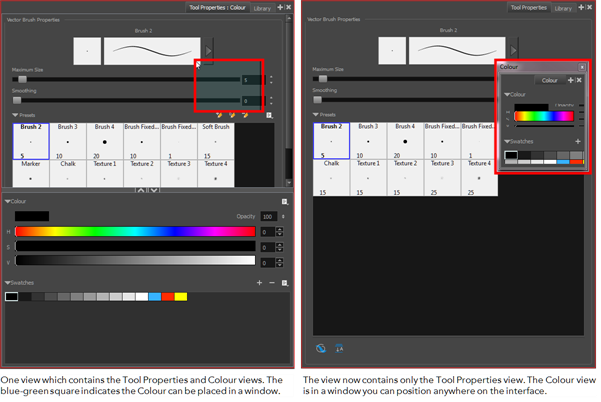
- Separate the Tool Properties/Colour and Library views and place them beside each other so you can see all its properties. Click the Tool Properties: Colour tab and drag it away. As you drag, notice that a blue-green square appears. This indicates that you can place this view in its own window. Release the mouse button.
The Colour view is separated from the Tool Properties view and exists in its own window.
- Reintegrate these two views by dragging the Colour view by its tab and moving it towards the bottom edge of the Tool Properties view. When you see a blue-green rectangle appear, release the mouse button to dock the Colour view.
The Colour view is reintegrated into the Tool Properties view.
- Drag the Library view by its tab and move it to the right-most side of the interface. When you see a blue-green vertical rectangle appear, release the mouse button to dock the Library view.
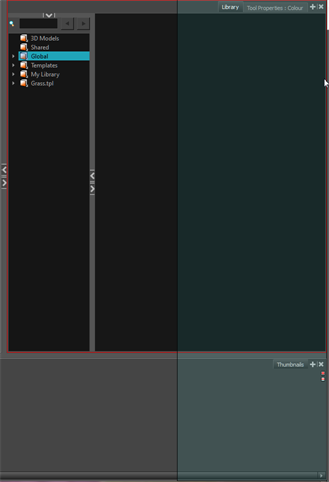
The Library view now appears vertically on the right side of the interface.
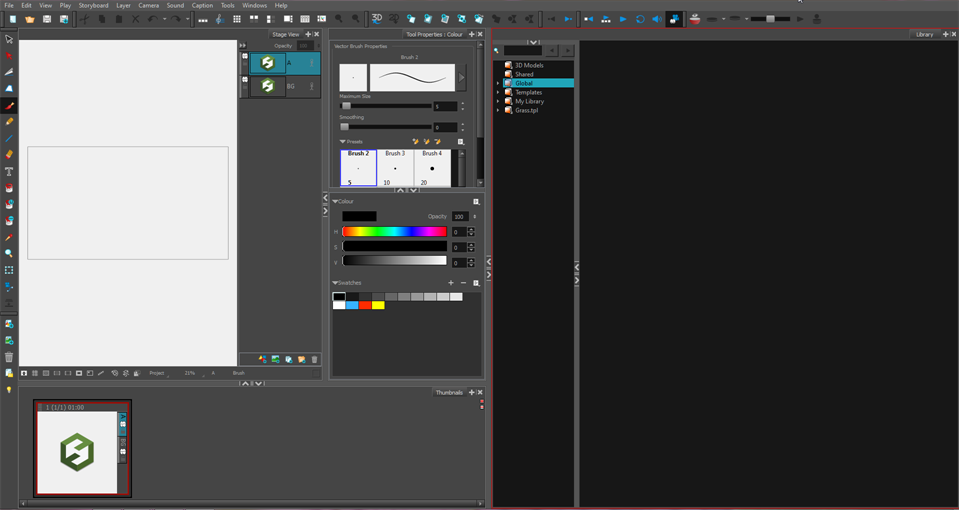
- To narrow the Library view slightly, drag the Expand/Collapse button to the right.

- Now make the Tool Properties/Colour view vertical as well.
- Use the Expand/Collapse buttons to adjust the width of the view until you are satisfied. Your workspace should look like this:

- Select Windows > Workspace > Save Workspace.
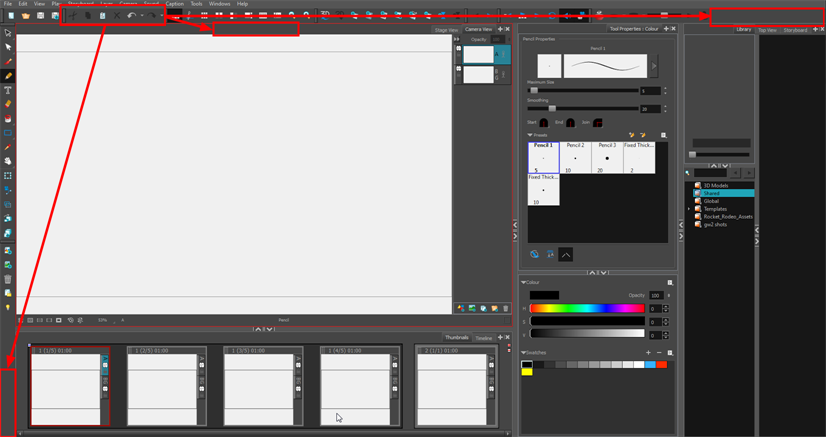
- Now it's time to experiment with moving toolbars. Select the toolbar to move by clicking its anchor point
 and dragging it to a toolbar area at the top or side of the interface.

As you drag the toolbar, a rectangle outline appears to indicate the available locations for the toolbar.
- Release the toolbar to drop it into position.
- Save your workspace.
Time Estimated 20 mins
Difficulty Level Beginner


