- Modules
- Camera Motion with Harmony Premium
- Activity 1: Creating a Camera Truck-in
Activity 1: Creating a Camera Truck-in
T-HFND-009-014
In this activity, you will practice creating camera motion on the z-axis. Use the provided sample material and the knowledge acquired in this module to complete the steps.
Material
- The final deserted_world scene you completed in the Staging module (MO-HFND-008)
- MO-HFND-009-Library/04-multiplane-setup.tpl
- MO-HFND-009-Library/05-camera-move.tpl
- MO-HFND-009-Library/06-camera-move-easing.tpl
How to animate the camera
- Open the final deserted_world scene you completed in the Staging module (MO-HFND-008). If you do not have it, do the following:
- Create a new Harmony project and name it deserted_world. Make sure to select the HDTV_1080p24 resolution.
- Select Scene > Scene Length and set the number of frames to 200 and click OK.
- From the Library view, import the 04-multiplane-setup.tpl template.
- Add a camera to your scene by selecting Insert > Camera.
- In the Timeline view, select the Camera layer.

- From the Layers toolbar, click the Add Peg
 button.
 - In the Tools toolbar, enable the Animate
 mode.
mode.
- On the right side of the Timeline view, on the Camera Peg layer, select the frame at which you want the camera move to start.
- In the Timeline toolbar, click the Add Keyframe
 button.
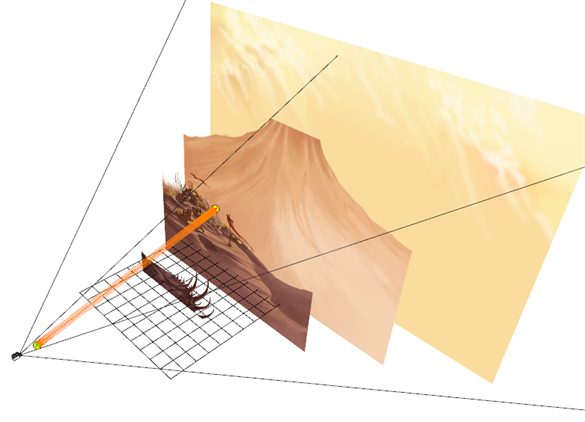
 - In the Top, Side or Camera view, select the camera (the large V-shaped cone) and move it to the desired position. In the Camera view, the camera is represented by a thin frame. You need to click directly on one of the edges.
- On the Timeline view, click the cell on which the camera move will end.
- In the Timeline toolbar, click the Add Keyframe button.
- Play back
 your animation.
NOTE: If you have issues with any of the previous steps, simply import the 05-camera-move.tpl template from the Library to the Camera view.
- In the Timeline view, select the first camera move keyframe.
- In the Timeline toolbar, click the Set Ease For Multiple Parameters
 button.
- In the graph, adjust the Bezier handles to change the velocity for all the selected functions.
- Click Apply/Next to adjust the last keyframe.
- Once complete, click Close.
- Save your project.
-
Play back
your animation.
Next Topic
Activity 2: Preparation and Preferences
Time Estimated 30 mins
Difficulty Level Beginner
Topics List
- About Cameras
- Adding a Camera
- Selecting the Active Camera
- About Pegs
- About Keyframes
- Adding Keyframes in the Timeline View
- Deleting Keyframes
- About Layer Parameters
- Enabling Constant Z
- Animating the Camera
- About Controls
- Displaying Controls
- Adding Control Points
- Setting Eases on Multiple Parameters
- Activity 1: Creating a Camera Truck-in
- Activity 2: Preparation and Preferences
- Activity 3: Multiplane Setup
- Activity 4: Camera Motion
- Activity 5: 3D Path Trajectories