- Modules
- Creating a Rig Template
- About Character Breakdown
About Character Breakdown
T-RIG-001-006
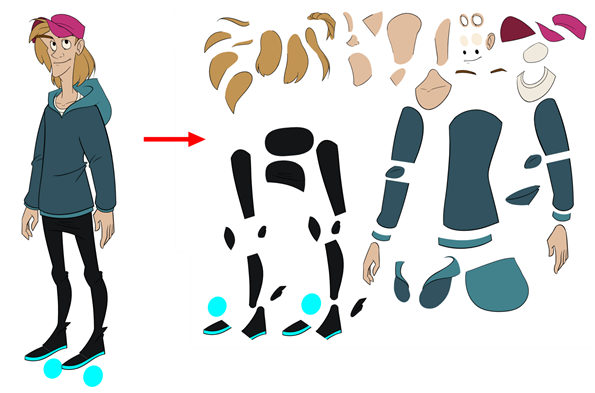
Now that you have imported or designed your model, the next step is to analyze it. This is to determine what parts will be broken apart and how they will be divided. Will the hair be separated into one, two or three sections? Will the hand be separated from the sleeve? To determine what is best for your character, observe the model in the Camera or Drawing view.
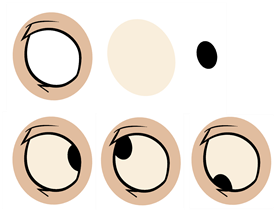
Eyelids and Pupils
For increased flexibility when animating the eyes, you can split them into three layers: the eyeball, the pupil and the eyelid. The eyelid layer is used for the blink and to cut the pupil when it gets too close to the side of the eyeball. For a more advanced break down, the two eyes are separated on their own individual three-layer sets.
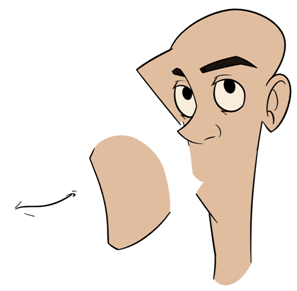
Separating the Mouth Elements and Jaw
To get a greater level of flexibility, you can separate the jaw from the head. You can also separate the mouth shape, teeth, tongue and interior one from another.
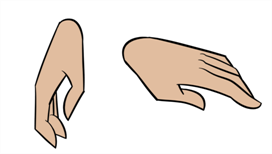
Keeping Fingers Attached to the Hand
To avoid needlessly complicating the break down, the fingers are not usually separated from the hand. The full hand is a single layer with a bank of different hands stored inside. This technique is easy to work with and produces a less mechanical effect.
Flipping Logos
You can separate logos and letters that appear on a character or a prop. This allows you to flip and reuse a character's puppet.

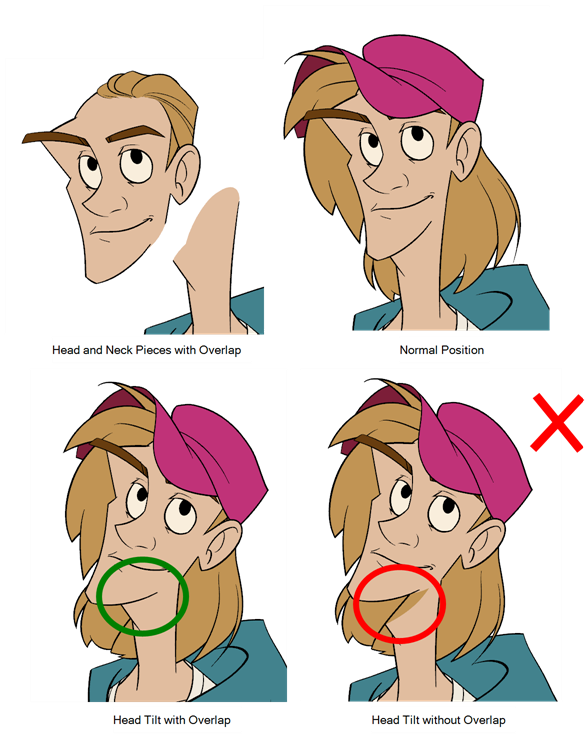
Complete and Overlapping Pieces
For a better result with animated parts, it is important to understand that they must be properly overlapping and complete. A common mistake is to trace the part just as it appears on the model.
Time Estimated 10 mins
Difficulty Level Intermediate
Topics List
- About Rig Types
- About Simple Rigs
- About Drawing Hierarchy Rigs
- About Peg Hierarchy Rigs
- Activity 1: Setting Preferences
- About Character Breakdown
- Activity 2: Adding Drawing Layers
- Activity 3: Naming Drawing Layers
- Node View
- Node Library View
- Adding Nodes
- Activity 4: Adding Composite Nodes
- Activity 5: Adding Pegs
- Activity 6: Grouping and Templating