- Modules
- Basic Effects with Harmony Premium
- Activity 2: Adding Blurs and Transparencies
Activity 2: Adding Blurs and Transparencies
T-HFND-010-015
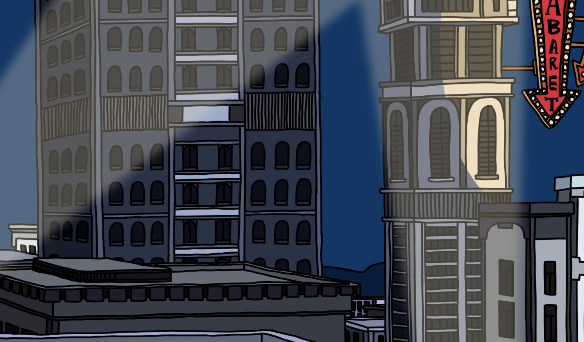
In this activity, you will add effect to animated search lights.

Material
- The final night_scene scene you completed in the previous topic or
- MO-HFND-010-Library/04-search-light-animation.tpl
- MO-HFND-010-Library/05-search-light-transparency.tpl
- MO-HFND-010-Library/06-search-light-blur.tpl
How to add blurs and transparencies
- Open the final night_scene scene you completed in the previous topic. If you do not have it, do the following:
- Create a new Harmony project and name it: night_scene. Make sure to select the HDTV_1080p24 resolution.
- Select Scene > Scene Length and set the number of frames to 120 and click OK.
- In the Library view, import the 04-search-light-animation.tpl template.
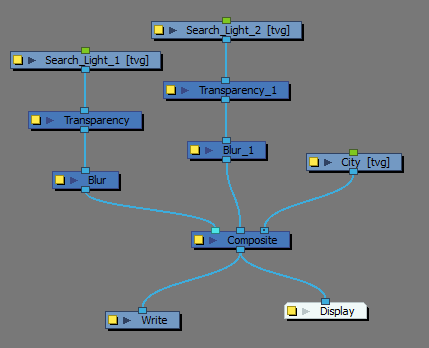
- From the Node Library, import 2 Blur-Radial and 2 Transparency nodes to the Node view.
- Connect the nodes so they match the following example. Each search light goes through a Transparency effect and then through a Blur effect.

- In the Camera view status bar, click the Render Mode
 button to preview your final effects. Remember that you cannot playback your animation in Render mode.
 - Double-click on the Blur or Transparency layers to adjust the blur radius and transparency parameters through the Layer Properties view.

- Save your project.
NOTE: If you have issues with any of the previous steps, simply import the 06-search-light-blur.tpl template from the Library to the Camera view.
Time Estimated 20 mins
Difficulty Level Beginner
Topics List
- About Effects
- Node View
- Node Library View
- Adding Effects
- About Input and Output Ports
- Connecting Effects
- Blur
- Transparency
- Cutter
- Using the Cutter Node
- Glow Node
- Highlight Node
- About Effects Preview
- Previewing Effects in Render Mode
- Playing Back Effects
- Exporting a QuickTime Movie
- Activity 1: Staging a Night Scene
- Activity 2: Adding Blurs and Transparencies
- Activity 3: Masking a Light Source