- Modules
- Basic Effects with Harmony Premium
- Using the Cutter Node
Using the Cutter Node
T-HFND-010-009A
You can use the Cutter node to cut out parts of a layer. You can also use it to only show certain parts of a layer by enabling its Inverted parameter.
How to use the Cutter effect
- Select a drawing layer and do one of the following:
- From the Node Library view, select the Cutter effect and drag it to the Node view.
- In the Node view, right-click and select Insert > Combine > Cutter.
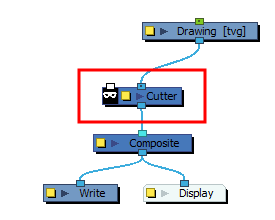
- Connect the Cutter node between the Drawing and Composite nodes.

- In the Timeline view, create a new layer, which will be used as your Cutter effect's Matte layer.
- In your new Matte layer, draw the shape that you want to cut out from your drawing layer.
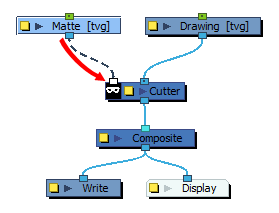
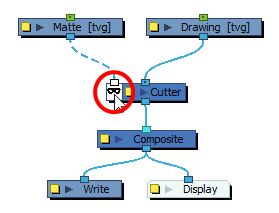
- Connect the Matte drawing to the Cutter node's matte port, on the left.

- If you want to invert the Cutter's effect, double-click on the Cutter node's Matte icon to toggle its Inverted parameter.

NOTE: If you only need to apply a matte to a single drawing layer, you can link this matte to your drawing layer's own matte connection. Each drawing layer has its own matte connection which can act as an individual cutter if connected to another drawing layer. In the Node view, you can connect a matte drawing node to a drawing node's matte connection by connecting the matte's output port to the left of the drawing node. A matte port will automatically be created.
Time Estimated 10 mins
Difficulty Level Beginner
Topics List
- About Effects
- Node View
- Node Library View
- Adding Effects
- About Input and Output Ports
- Connecting Effects
- Blur
- Transparency
- Cutter
- Using the Cutter Node
- Glow Node
- Highlight Node
- About Effects Preview
- Previewing Effects in Render Mode
- Playing Back Effects
- Exporting a QuickTime Movie
- Activity 1: Staging a Night Scene
- Activity 2: Adding Blurs and Transparencies
- Activity 3: Masking a Light Source