- Modules
- Drawing and Colour
- Setting the Onion Skin
Setting the Onion Skin
T-SBFND-008-014
After enabling the Onion Skin, you can set the number of previous and next panels to view. You can set the onion skin to display up to three panels.
How to enable Onion Skin
- Do one of the following:
- In the Onion Skin toolbar, click the Onion Skin
button.
- Press Alt+O (Windows) or ⌘+Alt+O (macOS).
- Select View > Onion Skin > Show Onion Skin.
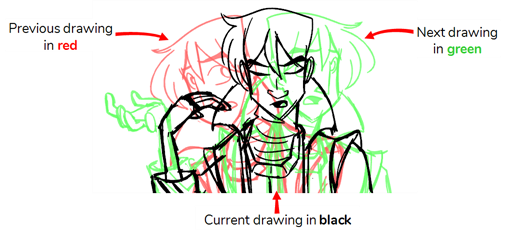
The Onion Skin for the previous panel will display in the Stage and Camera view in red, and the Onion Skin for the next panel will display in green.

Time Estimated 10 mins
Difficulty Level Beginner
Topics List
- About Drawing Tools
- Drawing with the Brush Tool
- About the Centerline Editor
- Drawing with the Pencil Tool
- Drawing with Bitmap Brushes
- Erasing with Hard and Soft Erasers
- Using the Light Table
- Reshaping with the Contour Editor Tool
- Cutting
- Drawing with the Polyline Tool
- About Colour Swatches
- Changing the Current Colour
- Adding Colour Swatches
- Painting
- Importing Images
- About the Onion Skin
- Setting the Onion Skin
- Flipping through Onion-skinned Drawings
- Activity 1: Using Onion Skin on Layers with the Same Name
- Editing Artwork on Multiple Panels
- Copying Artwork on Multiple Panels
- Activity 2: Drawing Scenes
- Generating Auto-Matte Layers
- Activity 3: Generating an Auto-Matte